Kubernetes Cluster
This page explains how to install the Semaphore Community Edition control plane on Kubernetes cluster.
Overview
If this is your first time using Semaphore, we suggest trying out Semaphore Cloud to see if the platform fits your needs. You can create a free trial account without a credit card and use every feature.
The self-hosted installation is recommended for users and teams that are already familiar with Semaphore.
Prerequisites
- A domain
- A Google Cloud or AWS account
Step 1 - Define the domain
We highly recommend installing Semaphore on a subdomain. Installing Semaphore on your base domain might interfere with other services running on the same domain.
If your base domain is example.com, you should define a subdomain such as ci.example.com for your Semaphore installation.
Step 2 - Prepare the environment
- Google Kubernetes Engine
- AWS Elastic Kubernetes Service
This section creates Google Cloud Kubernetes Engine (GKE) and prepares it for Semaphore Community Edition.
-
Install the following tools:
-
Log in to your Google Cloud
Login to GCPgcloud auth login -
Create a Google Cloud Project for your Semaphore server. Take note of the Google Project ID
-
Initialize a config file for your Semaphore and GCP project
DOMAIN: subdomain + domain for your installationROOT_EMAIL: email for the owner/administrator of the Semaphore serverROOT_NAME: Name for the owner/administrator of the Semaphore server
create semaphore-config file (example)echo export DOMAIN="your-subdomain-and-domain" > semaphore-config
echo export ROOT_EMAIL="administrator-email" >> semaphore-config
echo export ROOT_NAME=\"administrator-name\" >> semaphore-config
echo export GOOGLE_CLOUD_PROJECT_ID="you-gcp-project-id" >> semaphore-config
echo export GOOGLE_STATIC_IP_NAME="the-name-for-the-cluster-ingress-IP" semaphore-config
echo export GOOGLE_CERTIFICATE_NAME="a-name-for-the-tls-certificate" >> semaphore-config
echo export GOOGLE_CLOUD_ZONE="the-zone-for-your-cluster" >> semaphore-config
echo export GOOGLE_CLOUD_CLUSTER_NAME="your-cluster-name" >> semaphore-configShow me an example config
Create a config file for Google projectecho export DOMAIN="ci.example.com" > semaphore-config
echo export ROOT_EMAIL="admin@example.com" >> semaphore-config
echo export ROOT_NAME=\"Semaphore Admin\" >> semaphore-config
echo export GOOGLE_CLOUD_PROJECT_ID="my-semaphore-443021" >> semaphore-config
echo export GOOGLE_CERTIFICATE_NAME="my-semaphore-certificates" >> semaphore-config
echo export GOOGLE_STATIC_IP_NAME="my-semahore-ip" >> semaphore-config
echo export GOOGLE_CLOUD_ZONE=us-central1-a >> semaphore-config
echo export GOOGLE_CLOUD_CLUSTER_NAME="my-semaphore-gke" >> semaphore-config -
Switch to the Semaphore project on GCP
Switch to your Semaphore projectsource semaphore-config
gcloud config set project "${GOOGLE_CLOUD_PROJECT_ID}" -
Reserve a public IP address for the Kubernetes ingress
Reserve IPgcloud compute addresses create "${GOOGLE_STATIC_IP_NAME}" \
--project "${GOOGLE_CLOUD_PROJECT_ID}" \
--global -
Retrieve the assigned IP
Retrieve reserved IPexport IP_ADDRESS=$(gcloud compute addresses describe "${GOOGLE_STATIC_IP_NAME}" \
--project "${GOOGLE_CLOUD_PROJECT_ID}" \
--global \
--format='get(address)')
echo export IP_ADDRESS=$IP_ADDRESS >> semaphore-config -
Go to your domain provider's DNS settings
-
Create root domain A record
- Type: A
- Name: "your-subdomain" (e.g.
ci.example.com) - Value: the IP address of the Kubernetes ingress
-
Create a wildcard record
- Type: A
- Name: "*.your-subdomain" (e.g.
*.ci.example.com) - Value: the IP address of the Kubernetes ingress
-
Wait for DNS propagation (typically a few minutes). You can verify the creation of the TXT record in the Online Dig Tool for:
ci.example.com*.ci.example.com
-
Install certbot
install certbotsudo apt-get update
sudo apt-get -y install certbot -
Run certbot to create a TLS certificate
create certificates with certbotsource semaphore-config
mkdir -p certs
sudo certbot certonly --manual --preferred-challenges=dns \
-d "*.${DOMAIN}" \
--register-unsafely-without-email \
--work-dir certs \
--config-dir certs \
--logs-dir certs -
You are prompted to create a DNS TXT record to verify ownership of the domain
certbot challenge messagePlease deploy a DNS TXT record under the name:
_acme-challenge.ci.example.com.
with the following value:
EL545Zty7vUUvIHQRSkwxXTWsirldw91enasgB5uOHs -
Go to your domain's console and create the DNS TXT record required by certbot. Wait for the record to be propagated
tipYou can verify the creation of the TXT record in the Google Dig Tool. Type the challenge DNS TXT record and check if its value corresponds to the correct value.
-
Continue the certbot process. You should see a message like this
certificate generated messageSuccessfully received the certificate.
Certificate is saved at: certs/live/ci.example.com/fullchain.pem
Key is saved at: certs/live/ci.example.com/privkey.pem
This certificate expires on 2025-02-27.
These files will be updated when the certificate renews. -
Check the existence of the certificate files on the following paths. You will require both files during the Semaphore installation.
- Full chain certificate:
./certs/live/$DOMAIN/fullchain.pem - Private key certificate:
./certs/live/$DOMAIN/privkey.pem
- Full chain certificate:
-
You may delete the DNS TXT record from your domain at this point. It's no longer needed.
-
Correct the permissions of the certificate files
Change ownership of certificatessudo chown -R $USER certs -
Install the TLS certificates
Install certificatesgcloud compute ssl-certificates create "${GOOGLE_CERTIFICATE_NAME}" \
--certificate="certs/live/${DOMAIN}/fullchain.pem" \
--private-key="certs/live/${DOMAIN}/privkey.pem" \
--project="${GOOGLE_CLOUD_PROJECT_ID}"
-
Install the following tools:
-
Add your subdomain + domain to Route53 DNS. Take note of the hosted Zone ID for your domain within Route 53 (e.g.
Z05666441V6R4KFL4MJAA) -
Clone the Semaphore repository to your machine
Clone repositorygit clone https://github.com/semaphoreio/semaphore.git -
Navigate to the EKS Terraform folder
Go to the EKS foldercd semaphore/ephemeral_environment/terraform/eks -
Initialize your AWS CLI configuration
Login to AWSaws configure -
Initialize a config file for your Semaphore and AWS project
DOMAIN: subdomain + domain for your installationROOT_EMAIL: email for the owner/administrator of the Semaphore serverROOT_NAME: Name for the owner/administrator of the Semaphore server
create semaphore-config file (example)echo export DOMAIN="your-subdomain-and-domain" > semaphore-config
echo export ROOT_EMAIL="administrator-email" >> semaphore-config
echo export ROOT_NAME=\"administrator-name\" >> semaphore-config
echo export AWS_REGION="your-aws-region" >> semaphore-config
echo export ZONE_ID="your-route53-zone-id" >> semaphore-configShow me an example config
Create a config file for Google projectecho export DOMAIN="ci.example.com" > semaphore-config
echo export ROOT_EMAIL="admin@example.com" >> semaphore-config
echo export ROOT_NAME=\"Semaphore Admin\" >> semaphore-config
echo export AWS_REGION="us-east-1a" >> semaphore-config
echo export ZONE_ID="Z05666441V6R4KFL4MJAA" >> semaphore-config
Step 3 - Create the cluster
- Google Kubernetes Engine
- AWS Elastic Kubernetes Service
-
install the GKE plugin for the Google Cloud SDK
Install pluginsgcloud components install gke-gcloud-auth-plugin -
Enable the Kubernetes API for your project
Enable Kubernetes APIgcloud services enable container.googleapis.com --project ${GOOGLE_CLOUD_PROJECT_ID} -
Create the cluster. You may adjust the commands if you want to create more nodes or use more powerful machines. The command might take several minutes to complete
Create GKE instancegcloud container clusters create "${GOOGLE_CLOUD_CLUSTER_NAME}" \
--project "${GOOGLE_CLOUD_PROJECT_ID}" \
--zone "${GOOGLE_CLOUD_ZONE}" \
--num-nodes 1 \
--machine-type e2-custom-8-16384 \
--network "default" \
--subnetwork "default" \
--enable-ip-alias \
--cluster-version latest \
--no-enable-master-authorized-networks -
Once done, ensure you can access the cluster
Test cluster accessskubectl get nodes -
Install Emissary Ingress Controller
Install CRDskubectl apply -f https://app.getambassador.io/yaml/emissary/3.9.1/emissary-crds.yaml
kubectl wait --timeout=90s --for=condition=available deployment emissary-apiext -n emissary-system
-
Create the EKS cluster using Terraform
Create kuberntes cluster in AWSsource semaphore-config
TF_VAR_aws_region=$AWS_REGION TF_VAR_route53_zone_id=$ZONE_ID TF_VAR_domain=$DOMAIN terraform apply -
Check the Terraform output for the name of the cluster and save it in an environment variable
Save the name of the cluster to the config fileecho export EKS_CLUSTER_NAME="<the-name-of-your-cluster>" >> semaphore-config -
Once done, retrieve the TLS certificate ARN
Retrieve TLS certificatesecho export CERT_NAME=$(terraform output ssl_cert_name) >> semaphore-config -
Connect to the newly created cluster
Connect to new Clusteraws eks update-kubeconfig --name "${EKS_CLUSTER_NAME}" --region "${AWS_REGION}" -
Install Emissary Ingress Controller
Install CRDskubectl apply -f https://app.getambassador.io/yaml/emissary/3.9.1/emissary-crds.yaml
kubectl wait --timeout=90s --for=condition=available deployment emissary-apiext -n emissary-system
Step 4 - Install Semaphore
This Helm command installs the Community Edition. If you want to install the Enterprise Edition, refer see the Enterprise Installation page.
- Google Kubernetes Engine
- AWS Elastic Kubernetes Service
-
Sanity check that the environment is ready for the installation. The commands should not fail and return valid values
Sanity checksource semaphore-config
echo "DOMAIN=${DOMAIN}"
echo "IP_ADDRESS=${IP_ADDRESS}"
echo "GOOGLE_CERTIFICATE_NAME=${GOOGLE_CERTIFICATE_NAME}"
echo "GOOGLE_STATIC_IP_NAME=${GOOGLE_STATIC_IP_NAME}"
ls certs/live/${DOMAIN}/privkey.pem certs/live/${DOMAIN}/fullchain.pem -
Optionally, install k9s to manage and observe your K3s system
Install k9swget https://github.com/derailed/k9s/releases/latest/download/k9s_linux_amd64.deb && sudo apt install ./k9s_linux_amd64.deb && rm k9s_linux_amd64.deb -
Install Semaphore with Helm. The process can take between 10 to 30 minutes
Install Semaphorehelm upgrade --install semaphore "oci://ghcr.io/semaphoreio/semaphore" \
--debug \
--version v1.5.0 \
--timeout 40m \
--set global.domain.ip="${IP_ADDRESS}" \
--set global.domain.name="${DOMAIN}" \
--set global.rootUser.email="${ROOT_EMAIL}" \
--set global.rootUser.name="${ROOT_NAME}" \
--set ingress.staticIpName="${GOOGLE_STATIC_IP_NAME}" \
--set ingress.enabled=true \
--set ingress.ssl.enabled=true \
--set ingress.ssl.certName="${GOOGLE_CERTIFICATE_NAME}" \
--set ingress.ssl.type="google"
-
Sanity check that the environment is ready for the installation. The commands should not fail and return valid values
Sanity check environmentsource semaphore-config
echo "DOMAIN=${DOMAIN}"
echo "CERT_NAME=${CERT_NAME}" -
Optionally, install k9s to manage and observe your K3s system
Install k9swget https://github.com/derailed/k9s/releases/latest/download/k9s_linux_amd64.deb && sudo apt install ./k9s_linux_amd64.deb && rm k9s_linux_amd64.deb -
Install Semaphore with Helm. The process can take between 10 to 30 minutes
Install Semaphorehelm upgrade --install semaphore oci://ghcr.io/semaphoreio/semaphore \
--debug \
--version v1.5.0 \
--timeout 40m \
--set global.domain.name="${DOMAIN}" \
--set ingress.ssl.certName="${CERT_NAME}" \
--set global.rootUser.email="${ROOT_EMAIL}" \
--set global.rootUser.name="${ROOT_NAME}" \
--set ingress.className=alb \
--set ssl.type=alb
Step 5 - First Login
-
Once Semaphore is installed, you should see this message
=============================================================================================
Congratulations, Semaphore has been installed successfully!

To start using the app, go to: https://id.ci.tomfern.com/login

You can fetch credentials for the login running this command:

echo "Email: $(kubectl get secret semaphore-authentication -n default -o jsonpath='{.data.ROOT_USER_EMAIL}' | base64 -d)"; echo "Password: $(kubectl get secret semaphore-authentication -n default -o jsonpath='{.data.ROOT_USER_PASSWORD}' | base64 -d)"; echo "API Token: $(kubectl get secret semaphore-authentication -n default -o jsonpath='{.data.ROOT_USER_TOKEN}' | base64 -d)"
=============================================================================================
============================================================================================= -
Execute the shown command to retrieve the login credentials
get login credentialsecho "Email: $(kubectl get secret semaphore-authentication -n default -o jsonpath='{.data.ROOT_USER_EMAIL}' | base64 -d)"; echo "Password: $(kubectl get secret semaphore-authentication -n default -o jsonpath='{.data.ROOT_USER_PASSWORD}' | base64 -d)"; echo "API Token: $(kubectl get secret semaphore-authentication -n default -o jsonpath='{.data.ROOT_USER_TOKEN}' | base64 -d)"
Email: root@example.com
Password: AhGg_2v6uHuy7hqvNmeLw0O4RqI=
API Token: nQjnaPKQvW6TqXtpTNSx -
Backup your
semaphore-configin a safe place. It is required to upgrade Semaphore and renew expired certificates -
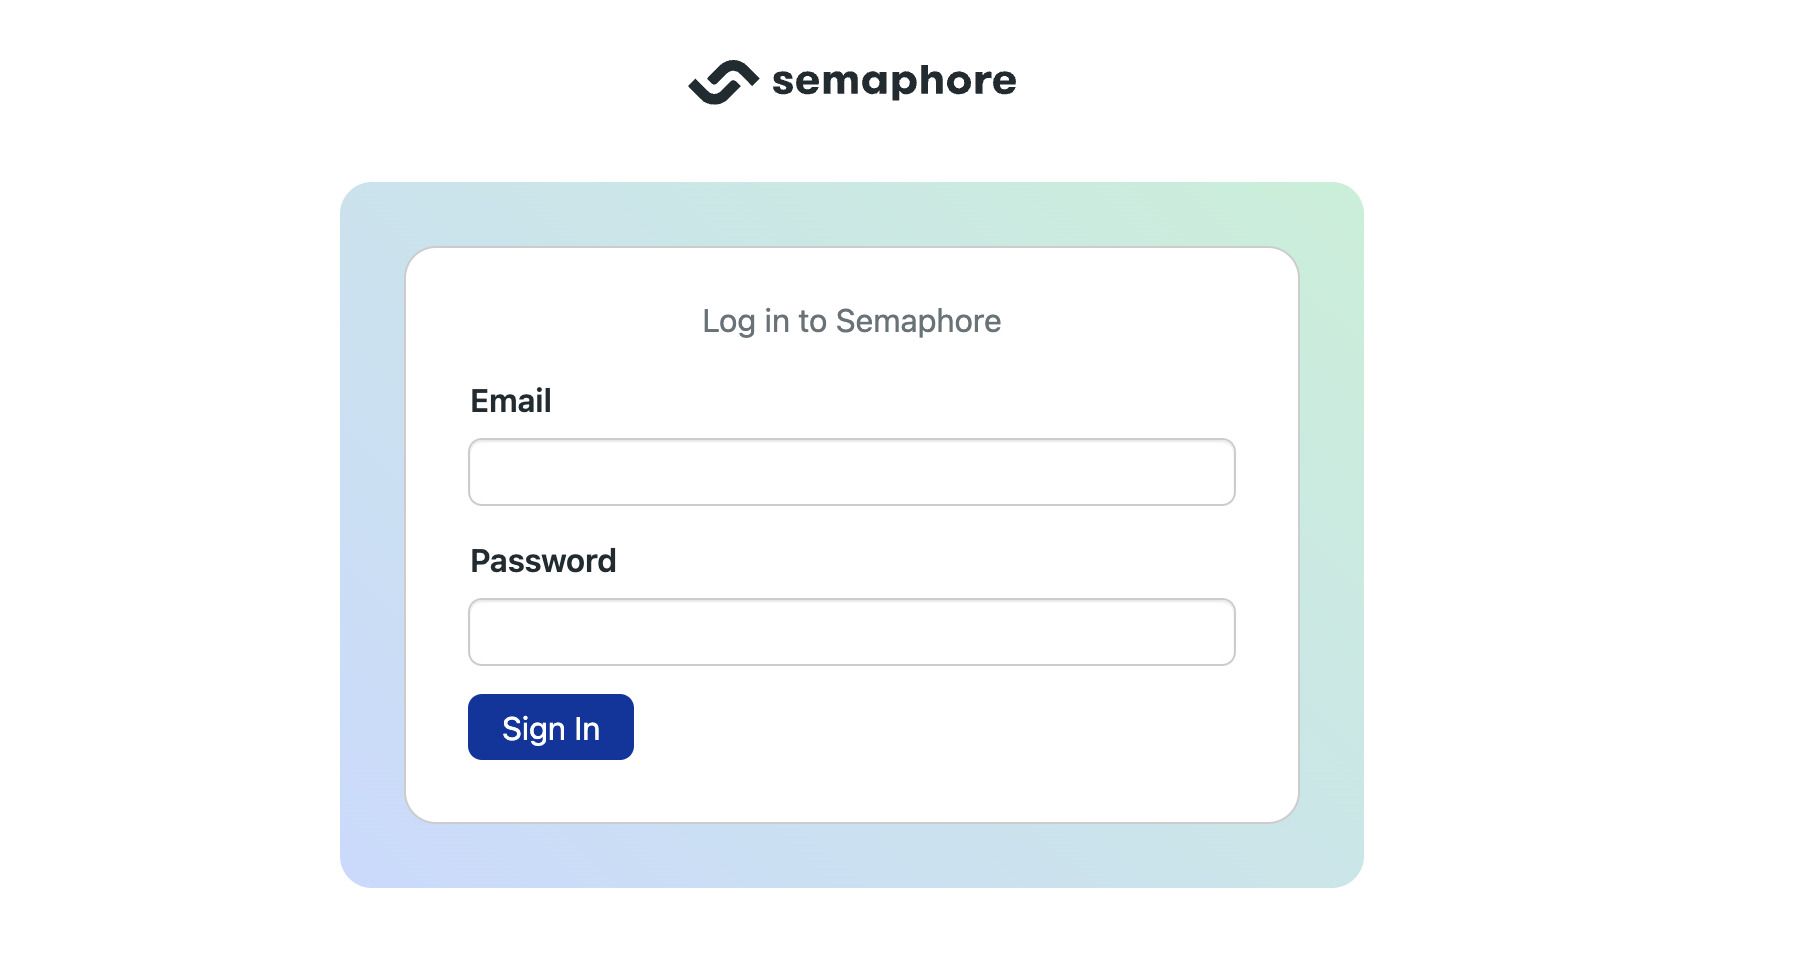
On your browser, open the subdomain where Semaphore was installed prefixed with
id, e.g.,id.ci.example.com -
Fill in the username and password. You might be prompted to set a new password
-
Open the server menu and select Settings

-
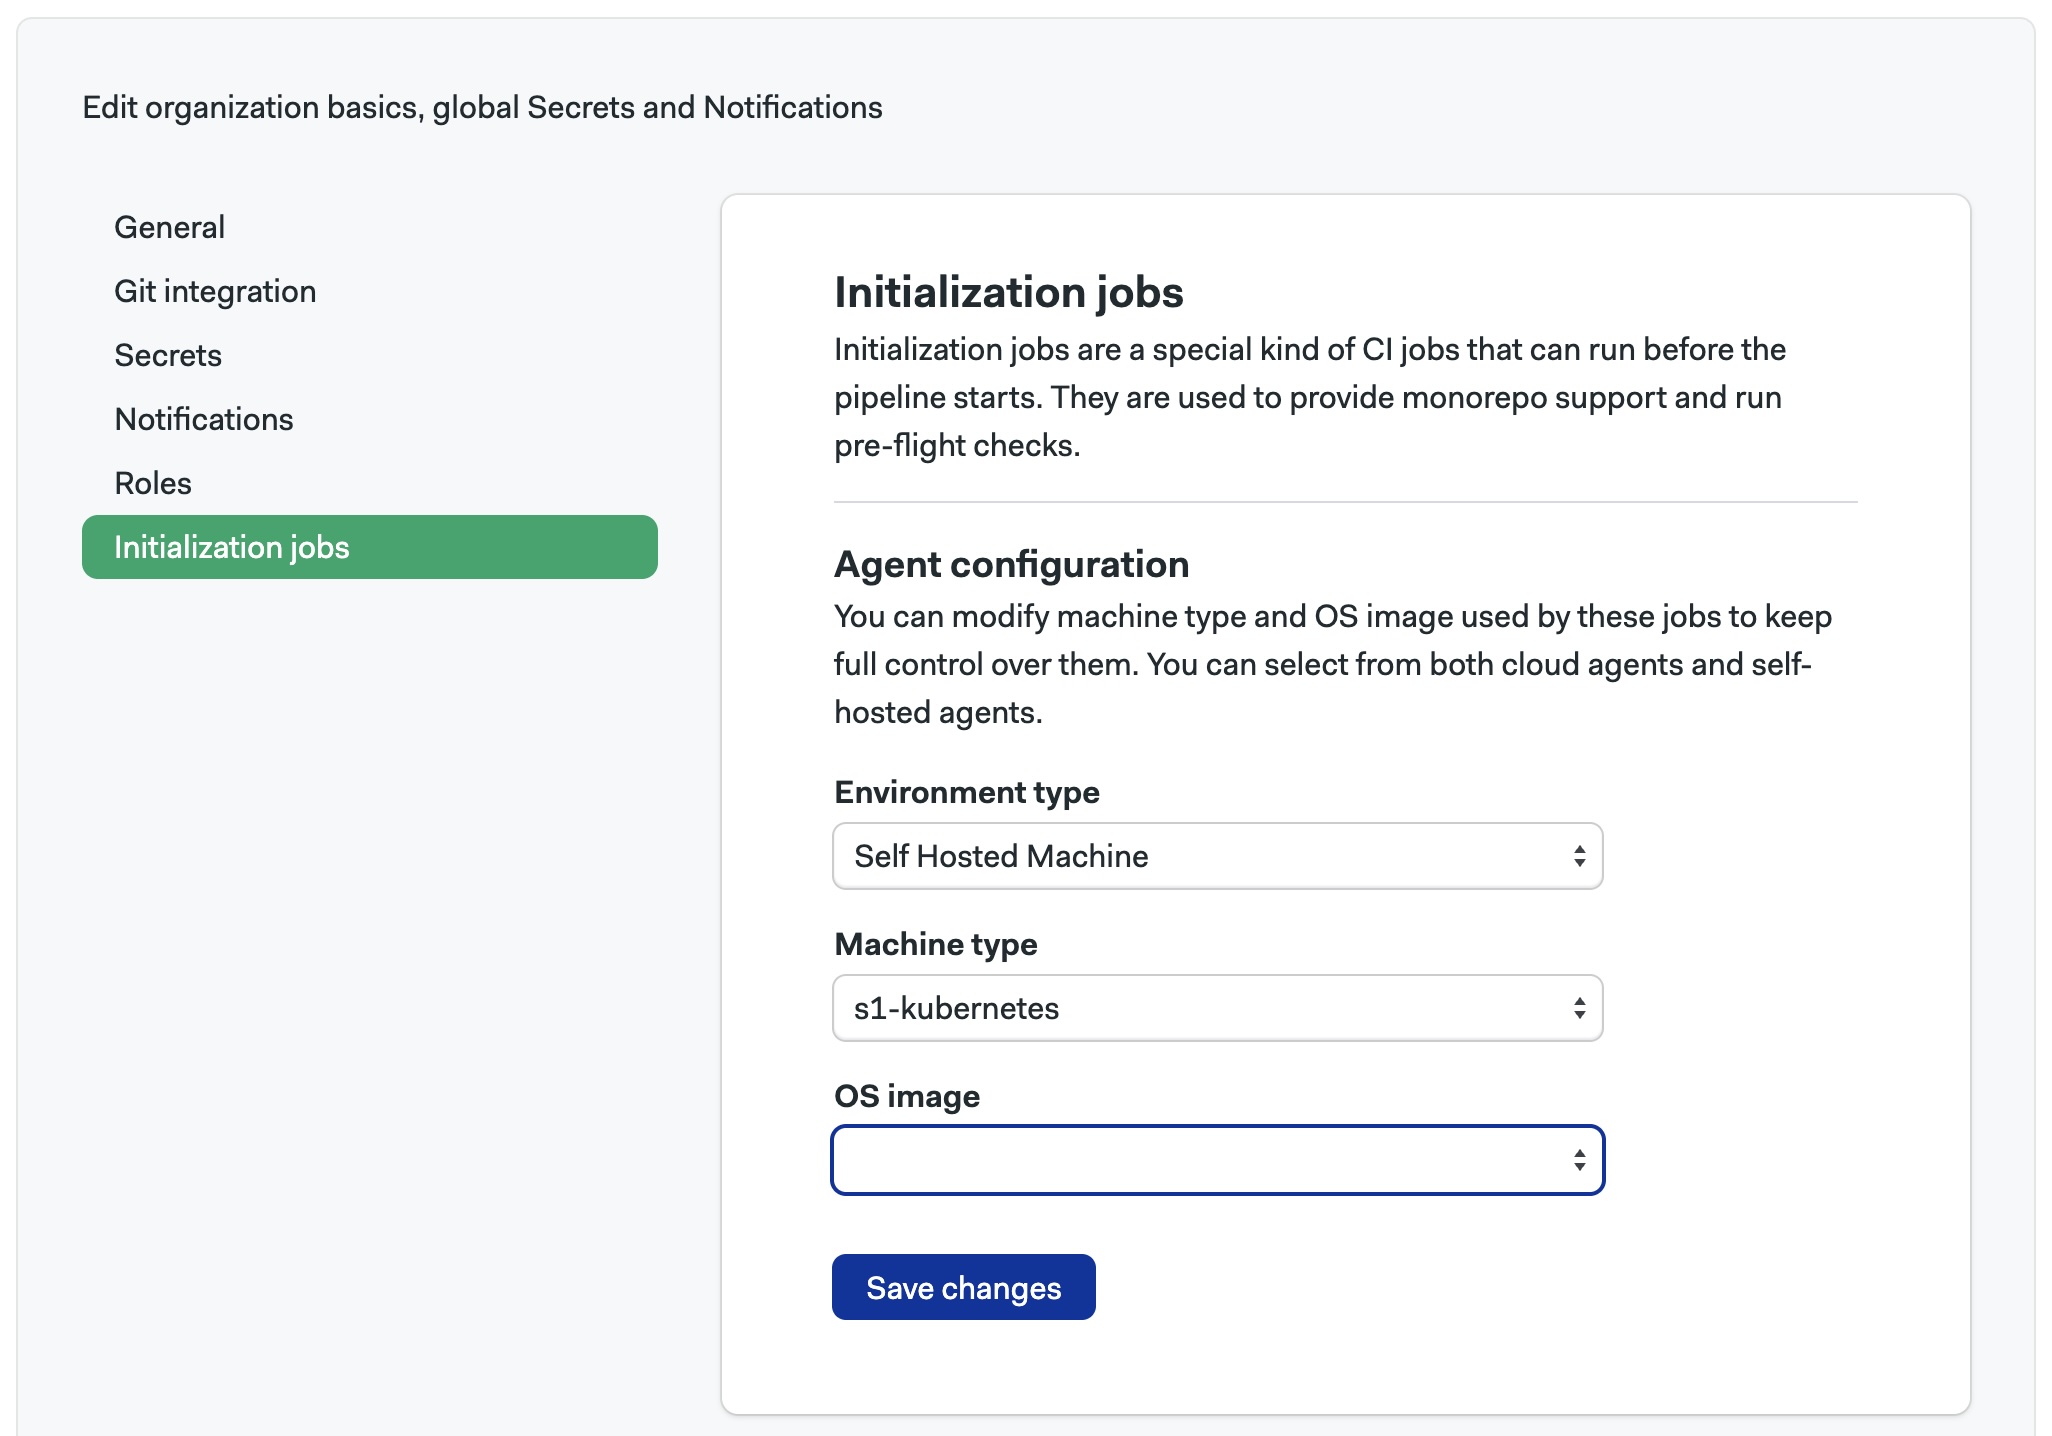
Select Initialization jobs
-
Select the Environment Type to
Self-hosted Machine -
Select Machine Type to
s1-kubernetesand press Save changesnoteYou should press Save changes even if the options were already selected.
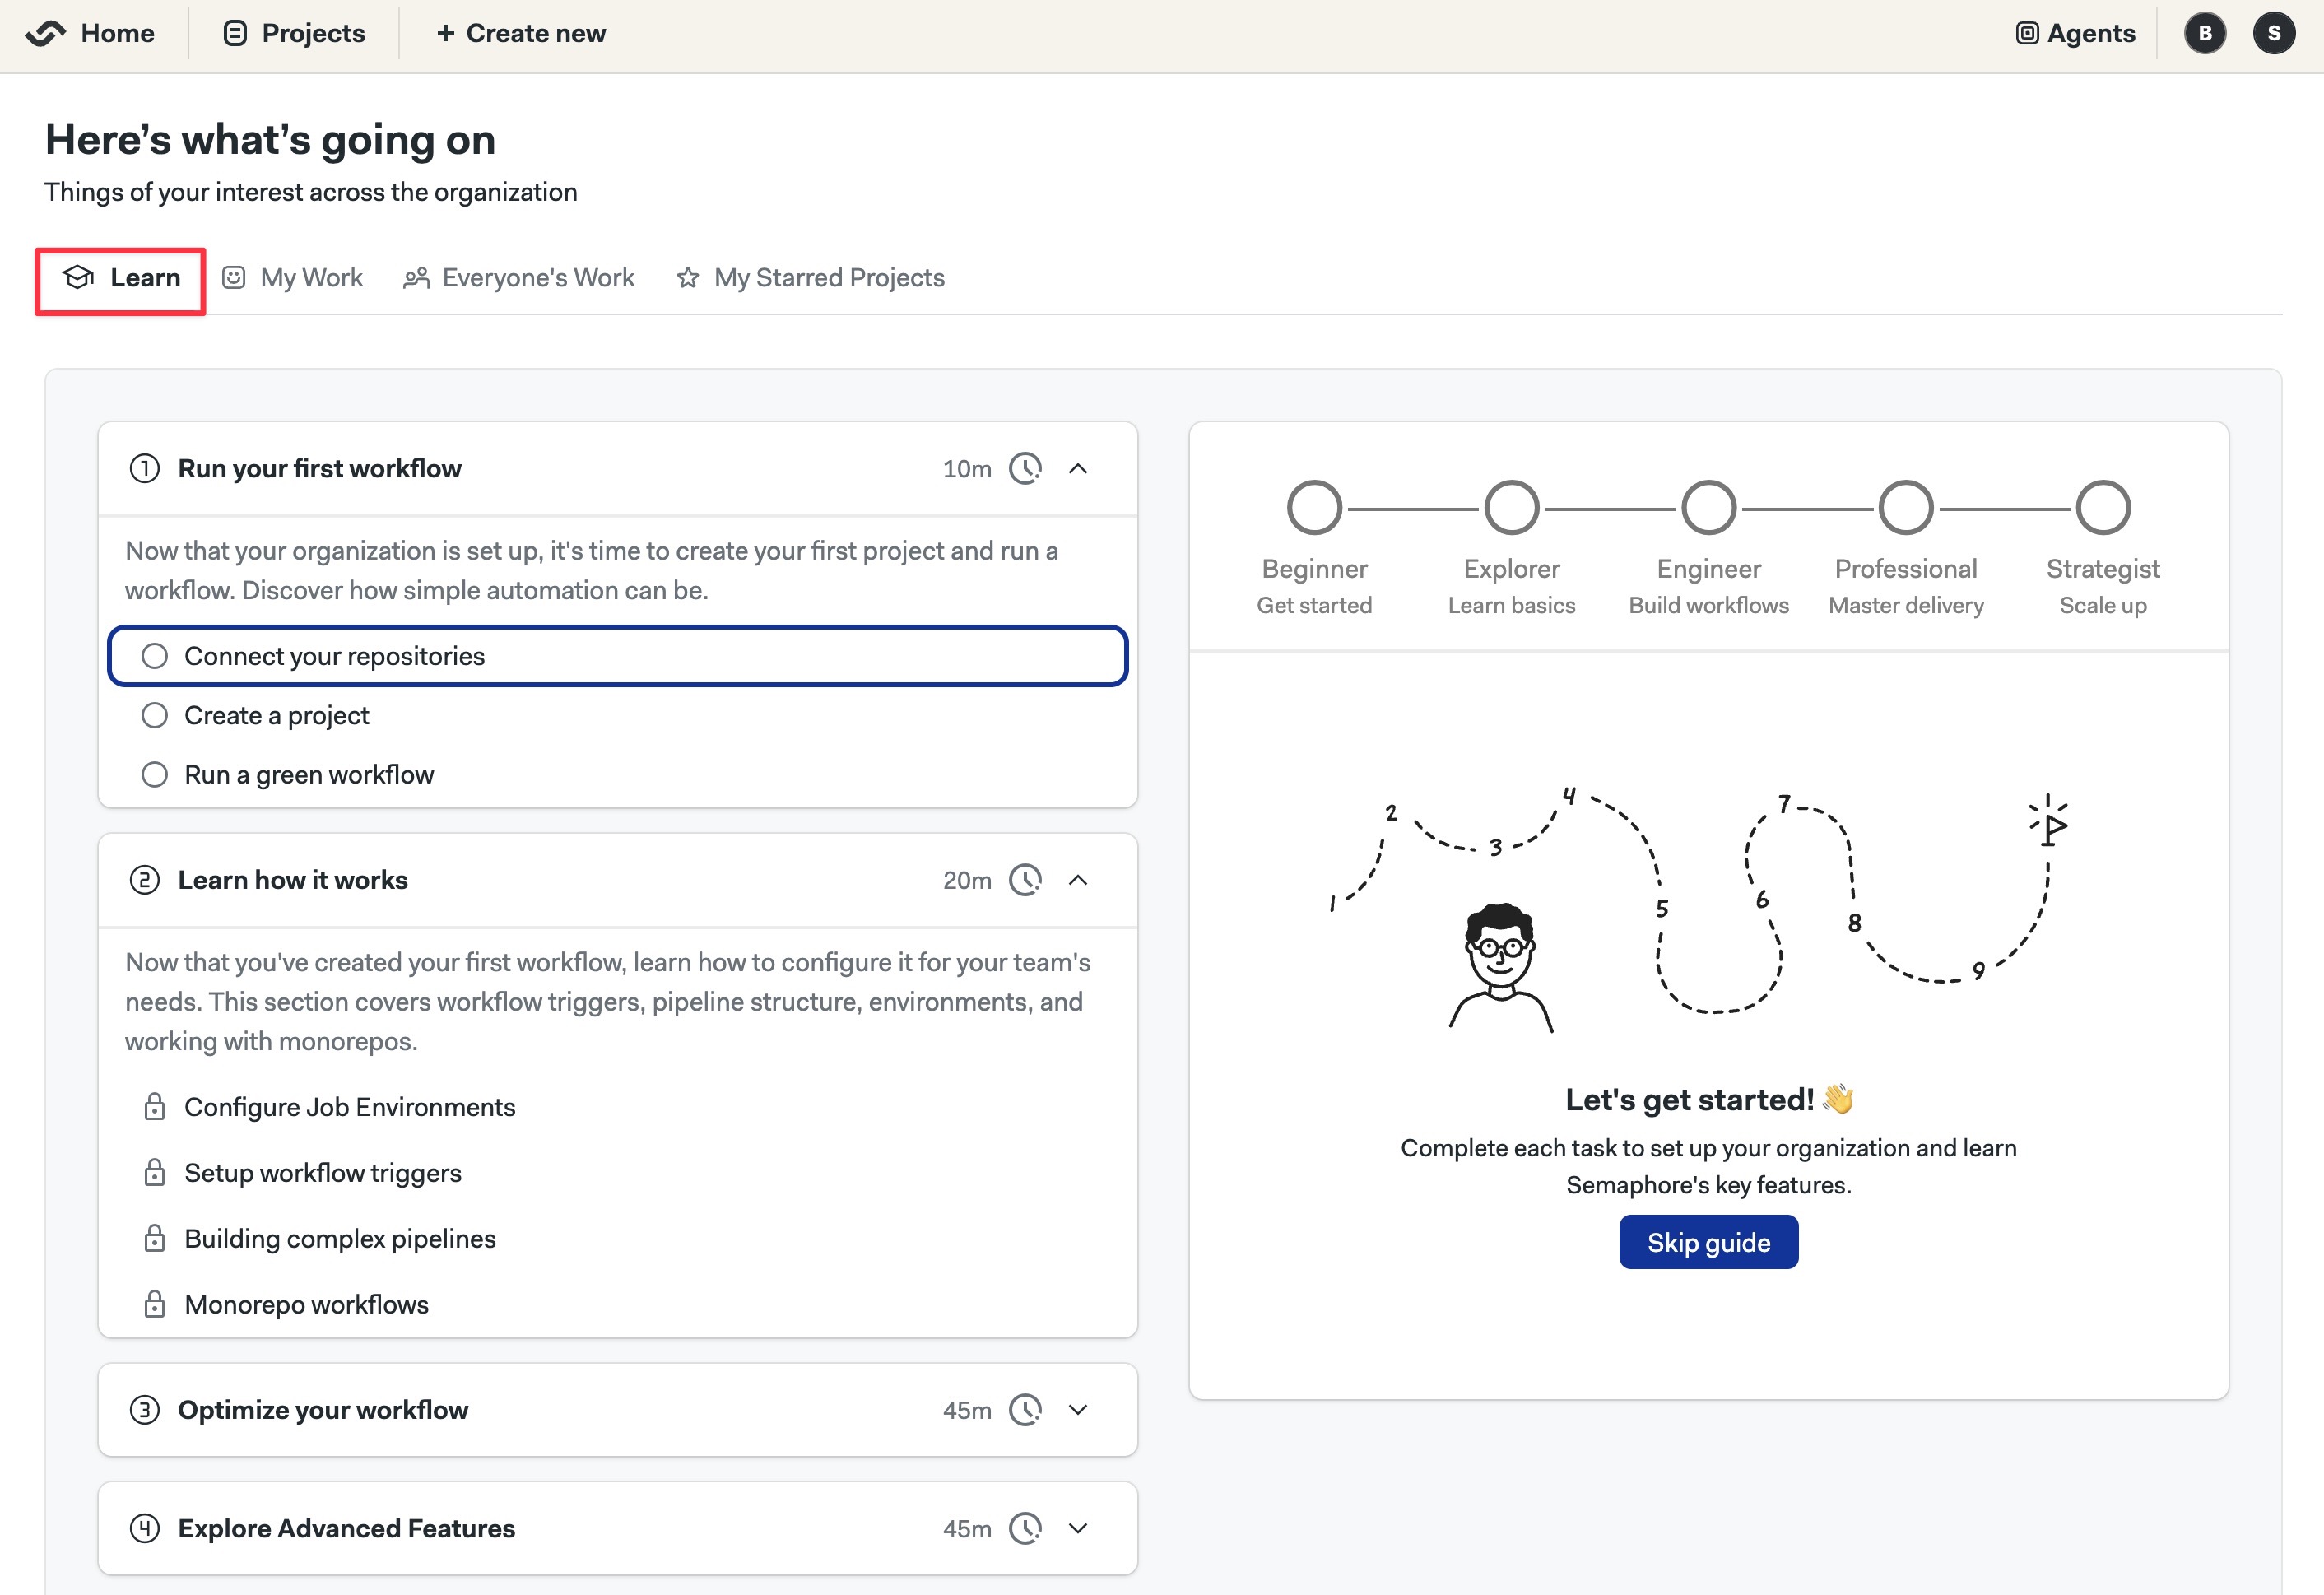
-
Return to the Semaphore initial page. On the Learn tab, you'll find the onboarding guide. Follow it to complete the setup and build your first project