Tasks
Video Tutorial: How to set up Tasks
Task allow you to trigger specific pipelines on a schedule or manually. This page explains how to create and run tasks, and what settings are available.
Overview
The main use cases for tasks are to:
- Run long or resource-intensive jobs outside the usual continuous integration workflow.
- Trigger pipelines not connected to any promotions
- Periodically rebuild an application or run security audits
- Continue testing projects even when they are inactive (not getting new commits)
- Run arbitrary code, track results, and get notifications
- Execute maintenance chores such as such database backups
- Running exceptional corrective actions such as pruning the cache
Limitations
Scheduled tasks have some limitations:
- Pipelines are triggered at a random second inside the scheduled minute. This helps disperse the load on the system.
- Tasks do not start automatically in the first 60 seconds after being created or edited.
- In the rare cases in which the scheduler fails to start a task, Semaphore retries it every 10 seconds for the following 15 minutes.
How to create a task
To create a task, open your project and follow these steps. You can create tasks with the UI, or use Semaphore CLI. Additionally, you can use the Semaphore API to manage tasks.
- UI
- CLI
-
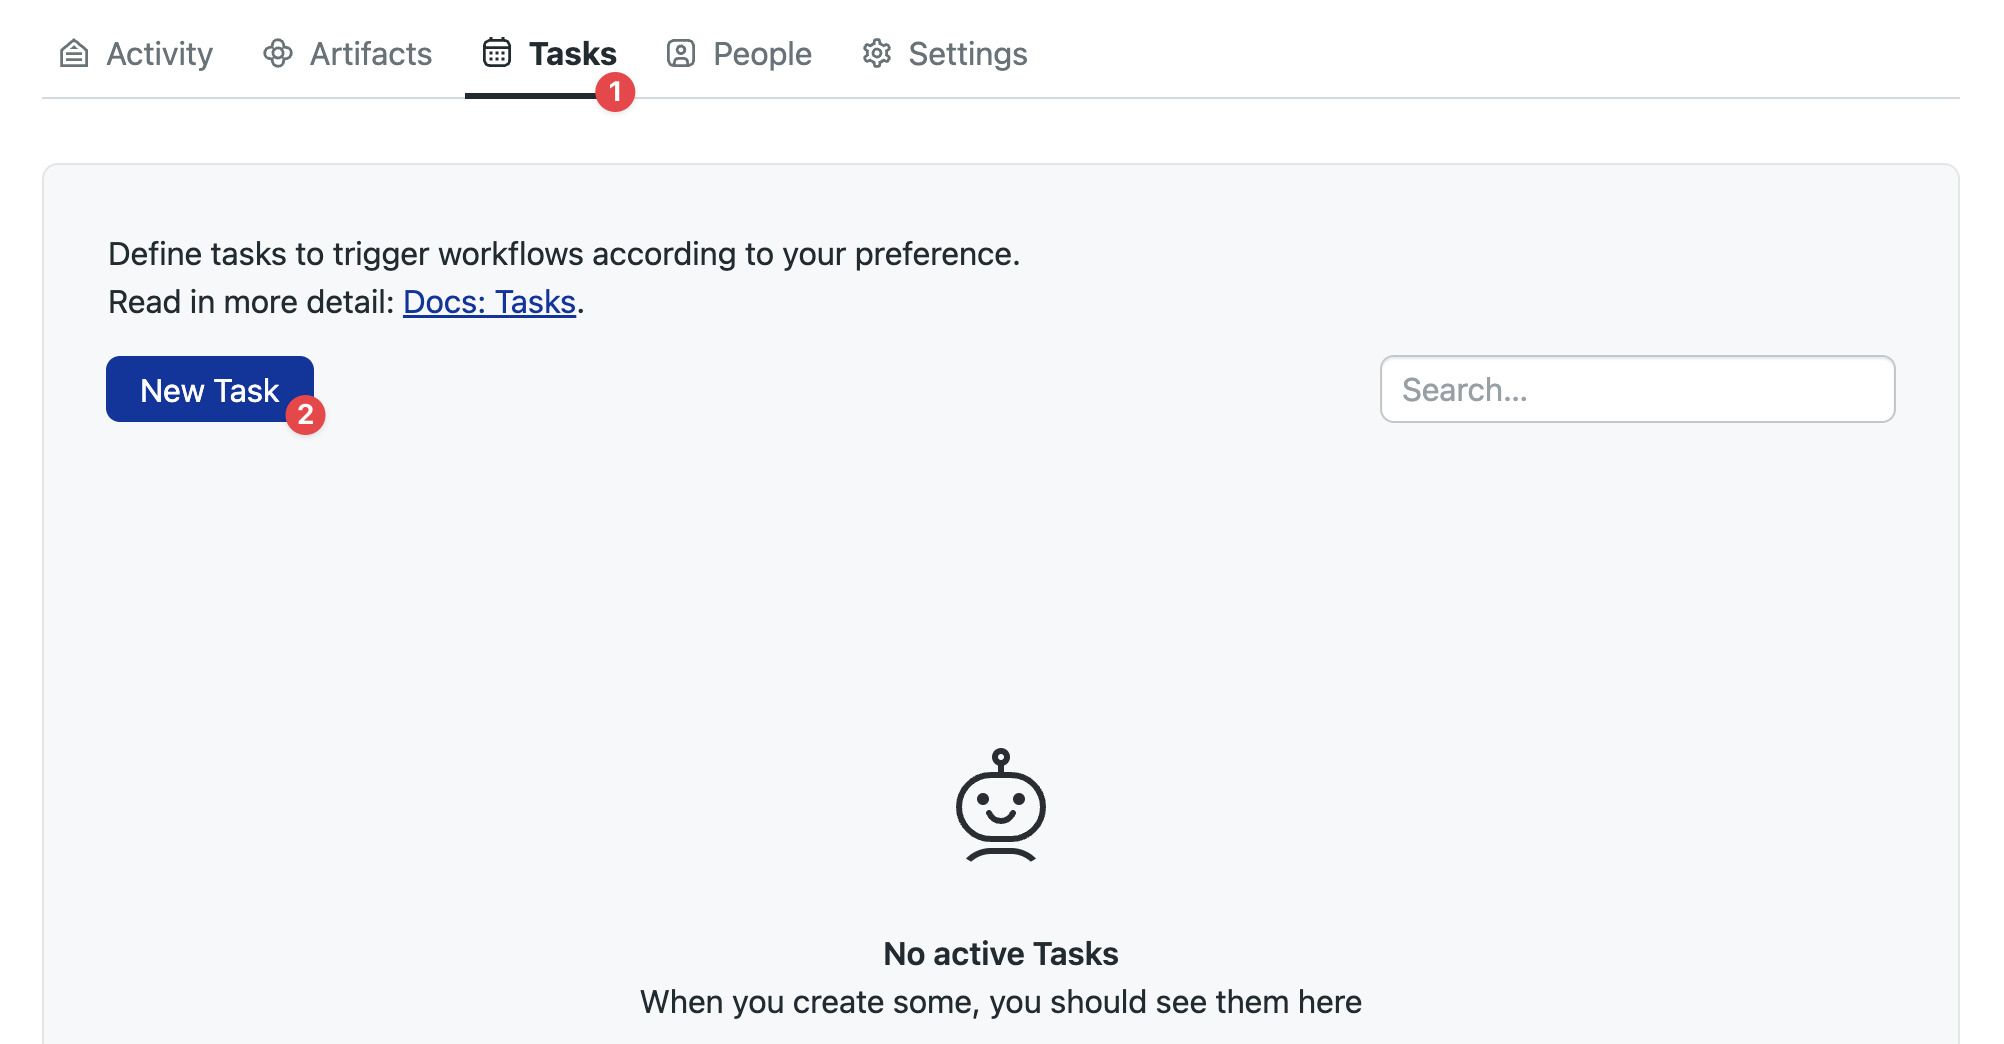
Select the Tasks tab
-
Press New task
-
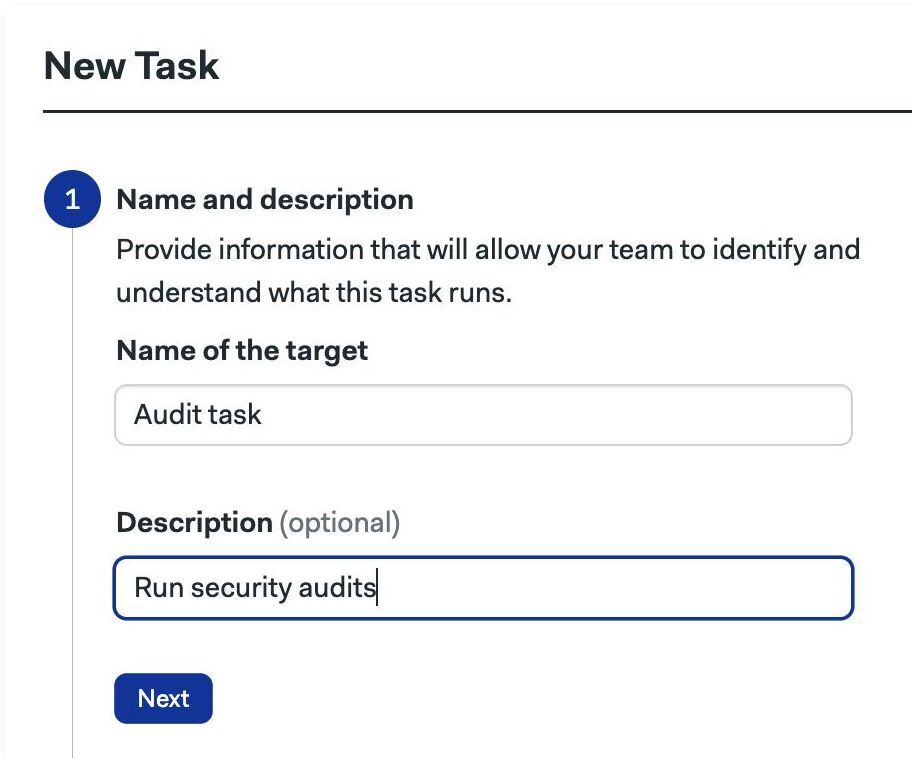
Type the task's name and description
-
Press Next
-
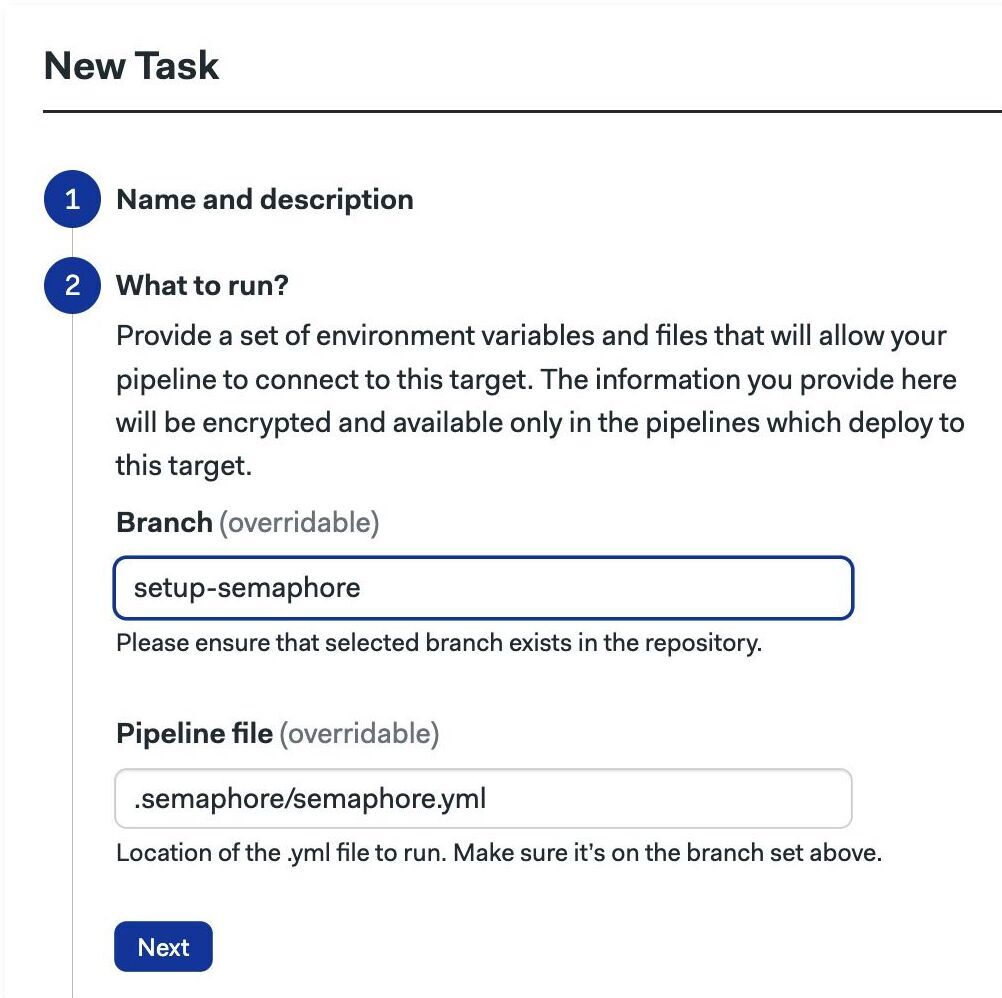
You can run the task on a given branch or tag. Select either branch or tag and type the desired value.
-
Type the pipeline file to execute. The only requisite is that the pipeline file exists in that reference. It doesn't need to (but it can) to be connected with a promotion to any other pipeline. Press Next
-
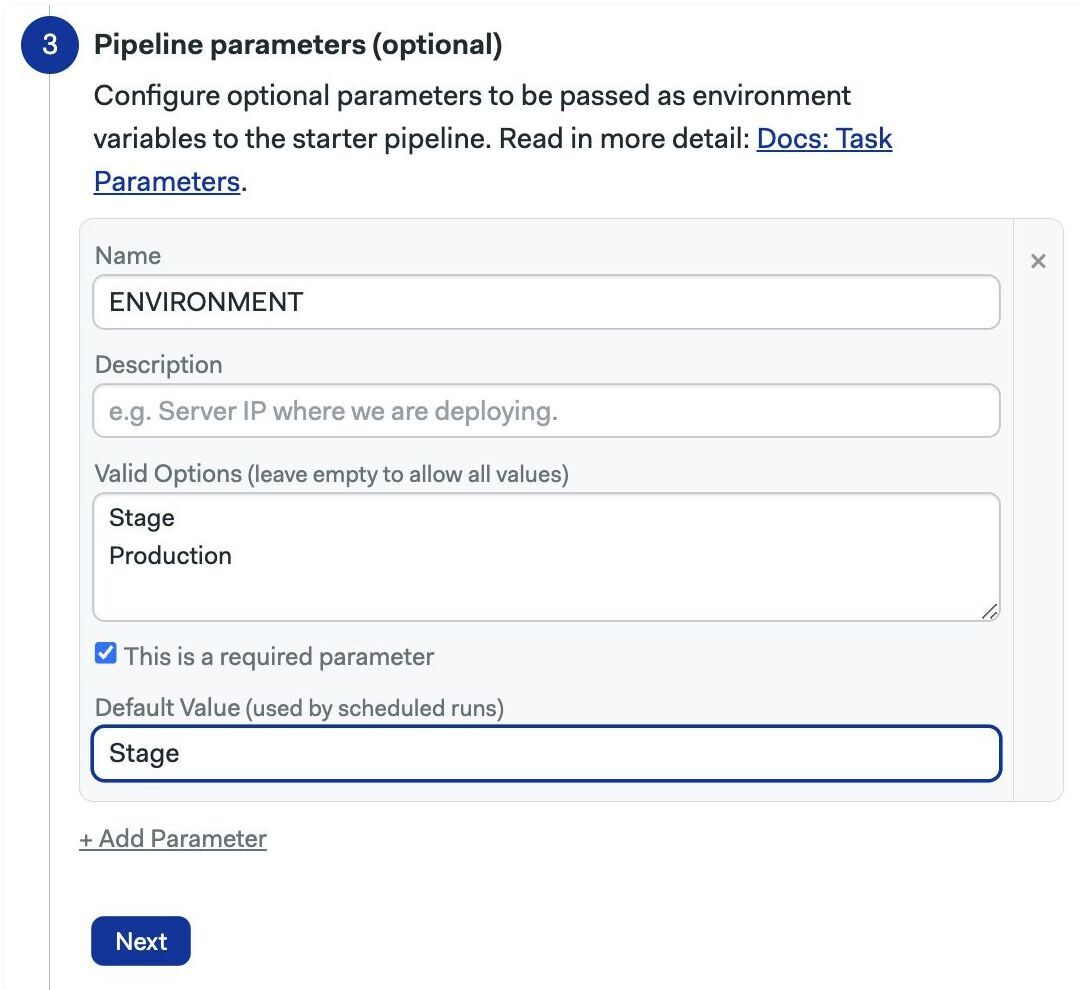
Optionally, you can add parameters. If your pipeline uses parameters, you can define their values for the task execution. Press Next
-
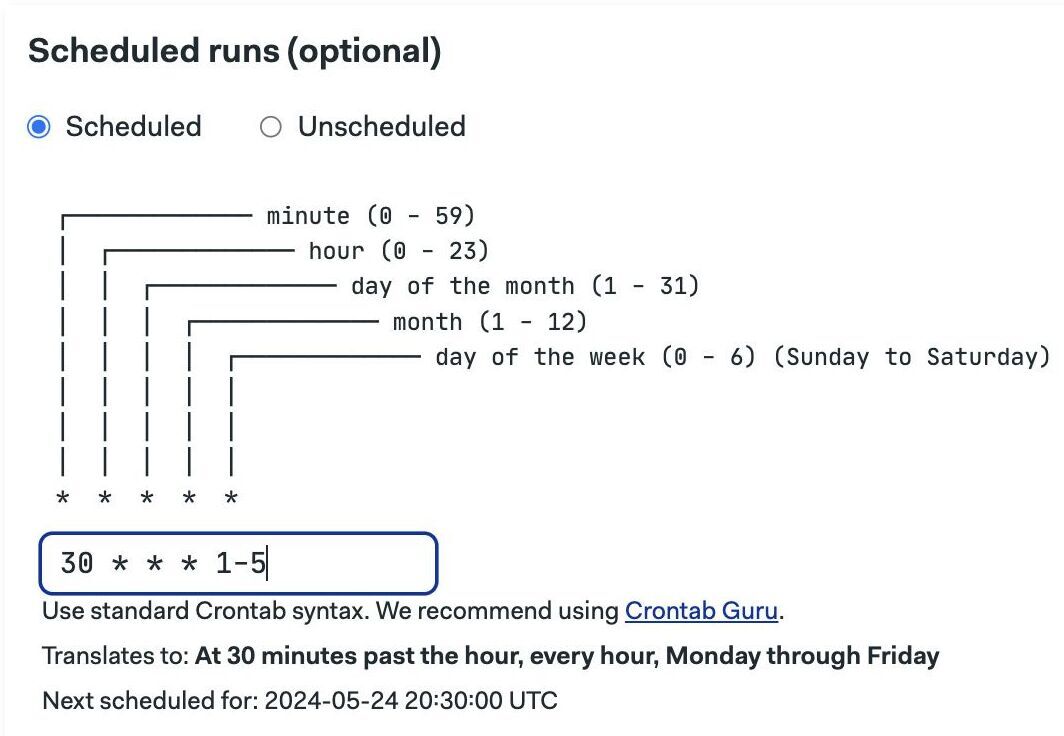
Define the schedule using crontab syntax. The example below is running Check the option "Unscheduled" if you want to only run the task manually
-
Press Next and Create
You can add tasks by editing the project using the Semaphore command line tool.
-
Run
sem edit project <project-name> -
An editor should open showing the project settings. For example, this is a project called "hello-semaphore"
sem edit project hello-semaphoreapiVersion: v1alpha
kind: Project
metadata:
name: hello-semaphore
id: a2ba1008-afc9-4326-b994-58fb816fc4d5
description: "This is a test project"
# ... -
Add a
tasksection. Each item in the list is a task. The example below shows two tasks:- Task "nightly-deploys" runs the
nighthly-deploys.ymlon "master" branch pipeline at 12:15 am every day. - Task "canary-setup" runs the same pipeline in "develop" branch with parameters
sem edit project hello-semaphore# ...
tasks:
# task 1
- name: nightly-deploys
branch: master
scheduled: true
at: "15 12 * * *"
pipeline_file: .semaphore/nightly-deploys.yml
# task 2 with parametrized promotions
- name: canary-setup
branch: develop
scheduled: false
pipeline_file: .semaphore/nightly-deploys.yml
parameters:
- name: CANARY_VERSION
required: true
default_value: "1.0.0"
# task 3 with tag
- name: release-deploy
reference:
type: tag
value: v1.0.0
scheduled: false
pipeline_file: .semaphore/deploy.yml - Task "nightly-deploys" runs the
-
Save the file to submit your changes
How to view your tasks
Go to the Tasks tab in your project to view the configured tasks.
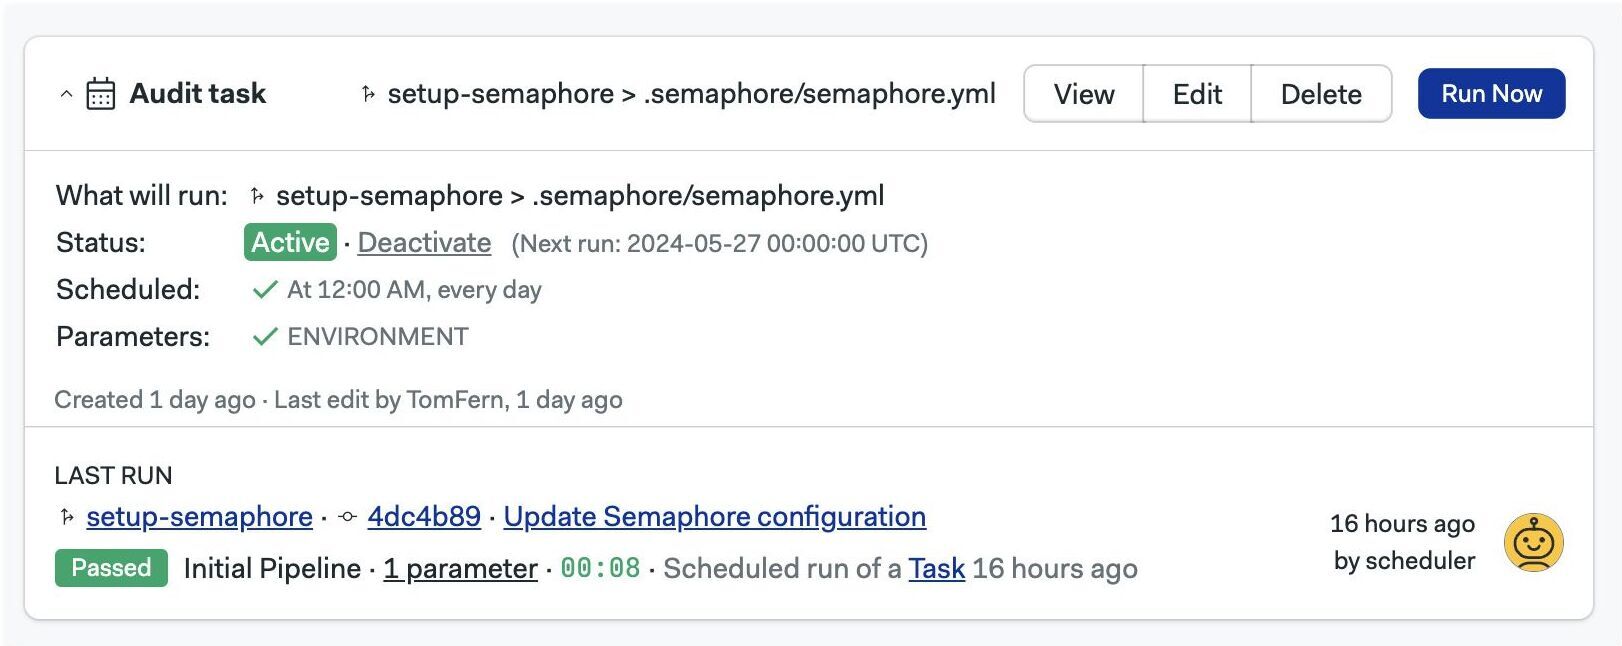
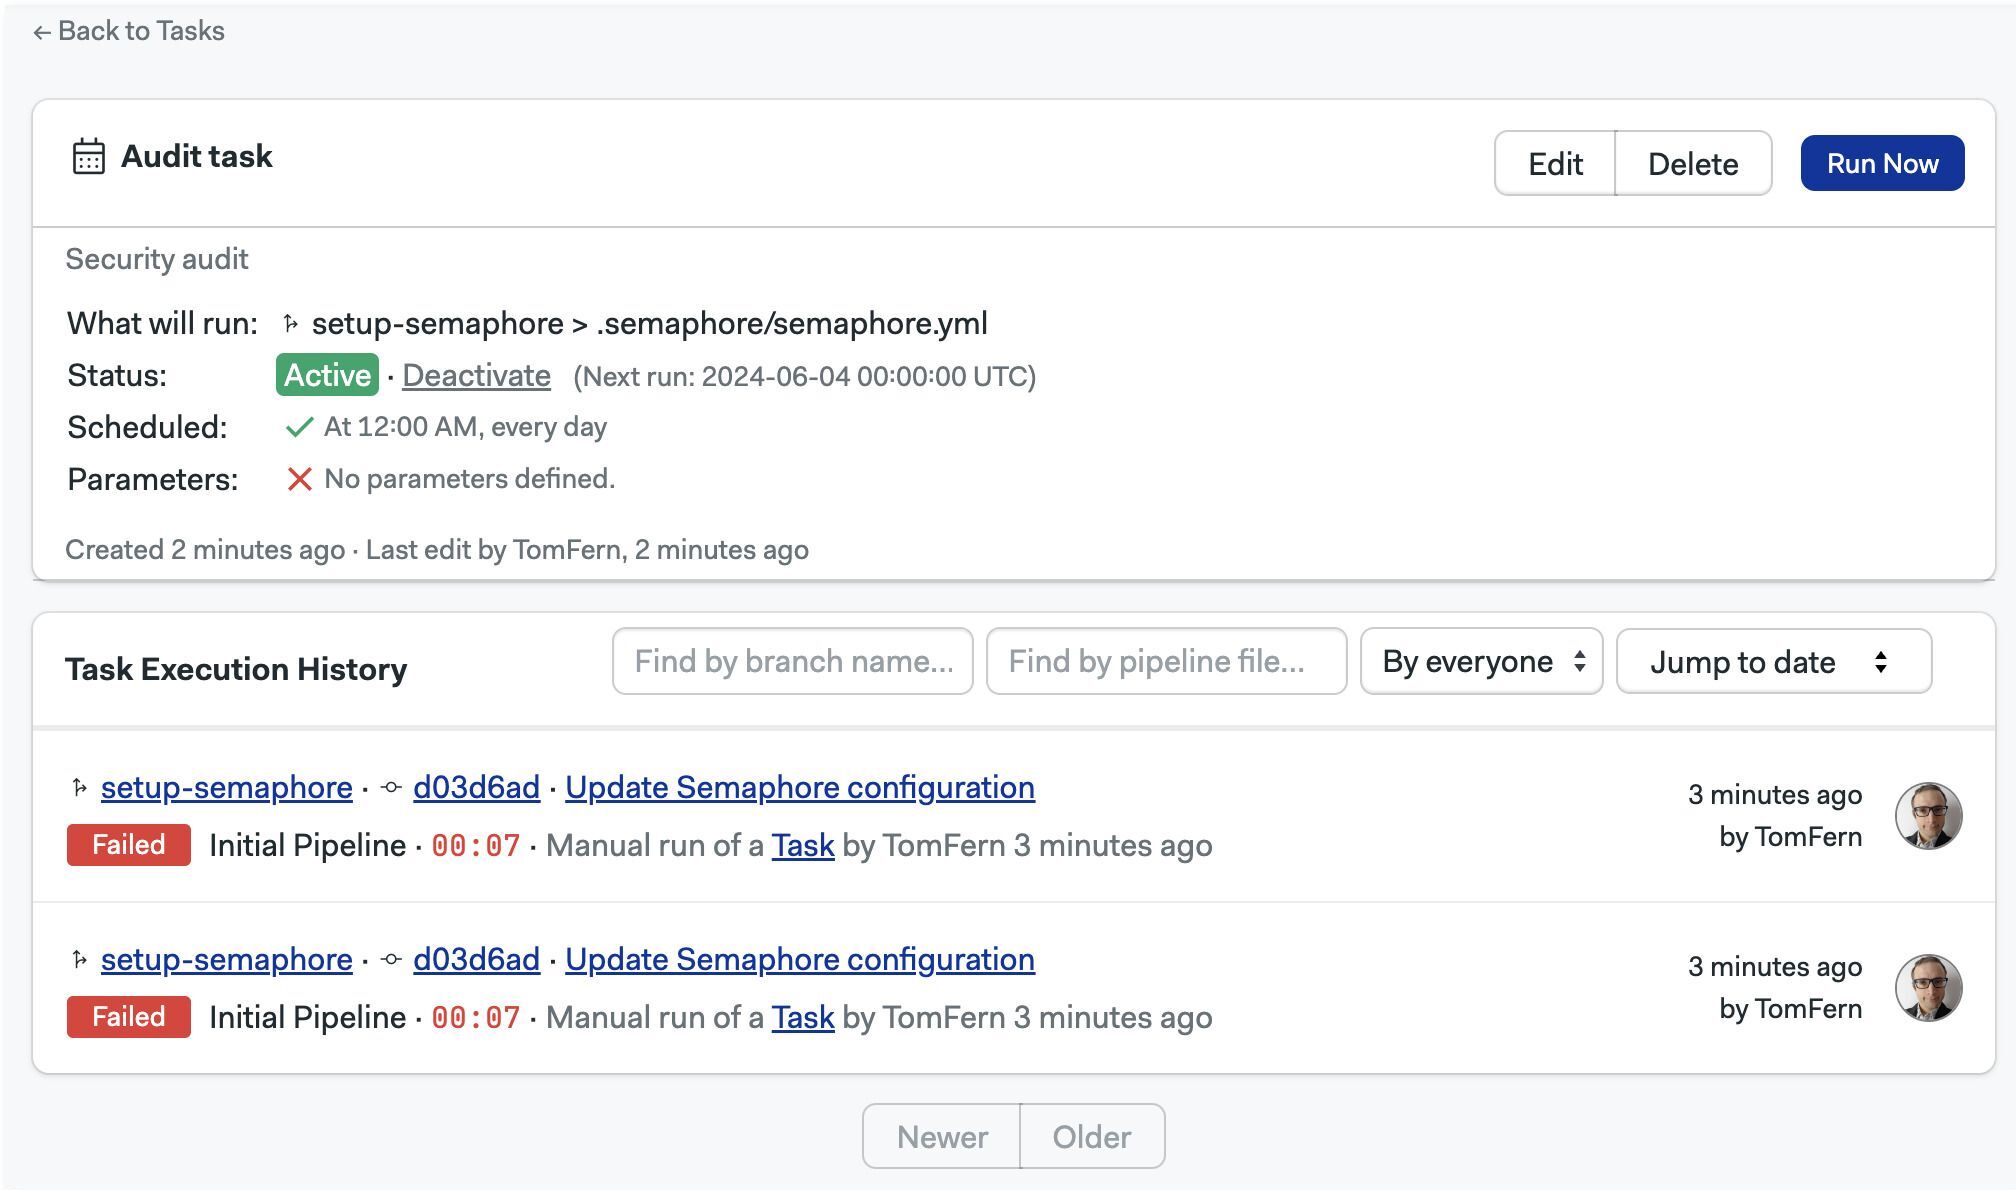
Press the View button to view the execution log for this task.
How to run tasks manually
Go to the Tasks tab in your project to view the configured tasks. Pressing Run now shows you the following screen.
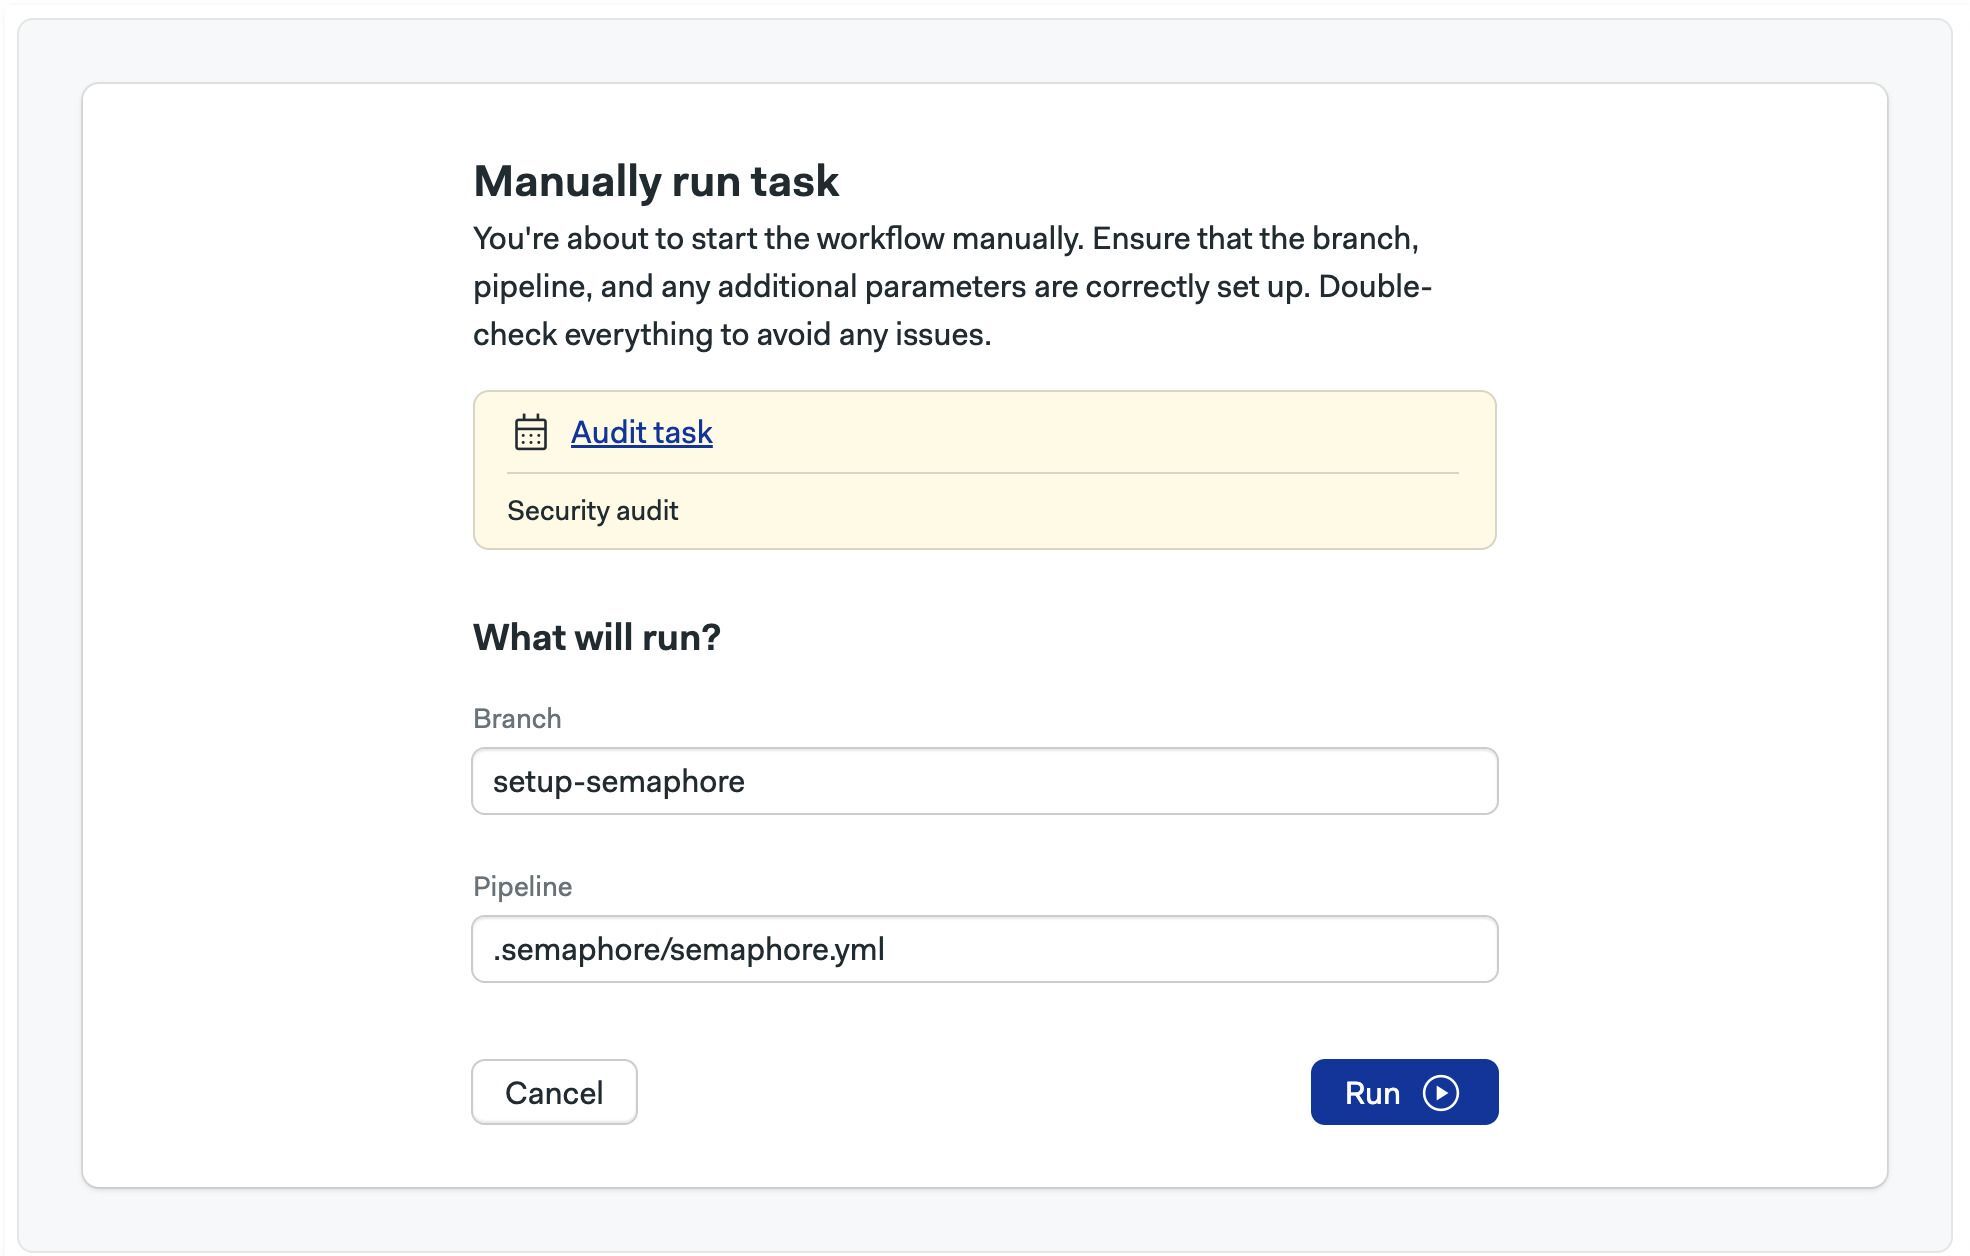
Here you can change the branch, pipeline file, and define parameter values. Press Run to start the task immediately.
You may also trigger a task using the Semaphore API
Commit statuses for tasks
Every pipeline Semaphore runs reports a commit status back to your Git provider — the check marks you see next to a commit or on a pull request. A task that runs on a schedule reports against whatever commit is at the head of its branch, so a frequent task can bury a pull request in check marks it never asked for. GitHub also caps each commit at 1000 statuses per context.
Each task controls this for itself with two checkboxes in the Basics section of the task form:
- Don't send status checks for scheduled runs — silences pipelines this task starts on its schedule
- Don't send status checks for manual runs — silences pipelines this task starts when it is run on demand, whether from the Run now button, the API, or the CLI
Both are unchecked by default, so tasks send commit statuses unless you say otherwise. The two are independent: you can silence the schedule while keeping statuses for manual runs, or the reverse.
A checked box applies to every pipeline that task starts with that trigger, reruns included, and to any promotion inside those pipelines. Pipelines started by a push or a pull request are never affected — they always report.
Changing a checkbox takes up to five minutes to apply, so a run started right after you save it may still report.
In a project YAML file the same settings appear on each task:
tasks:
  - name: nightly-build
    scheduled: true
    branch: master
    at: "0 3 * * *"
    pipeline_file: ".semaphore/cron.yml"
    status: ACTIVE
    skip_scheduled_run_notifications: true
    skip_manual_run_notifications: false
If Semaphore cannot determine which task started a pipeline — for example the task was deleted after the workflow began — the pipeline sends its commit status as usual.
How to pause a task
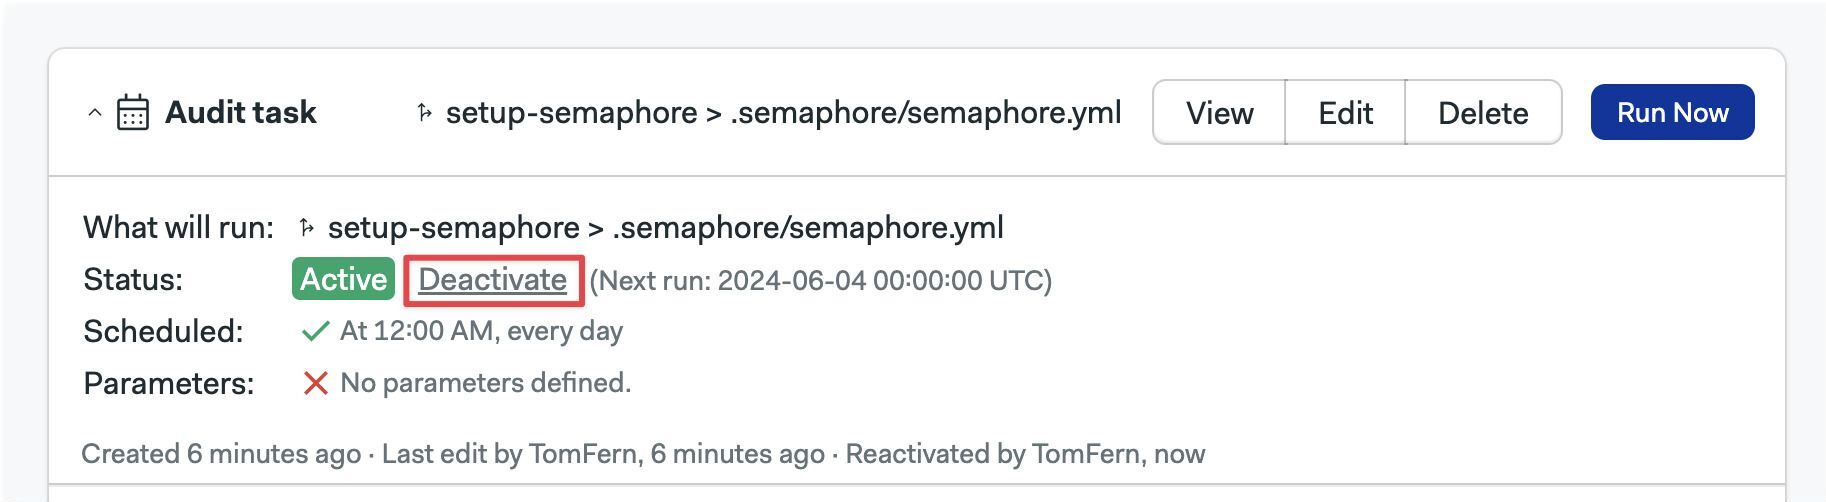
Deactivating a task disables the schedule. Deactivated tasks can still be run manually. If you don't need the task or its history, delete the task instead.
Go to the Tasks tab in your project and:
-
Locate the task you want to deactivate.
-
Click the Deactivate link
-
Confirm the prompt
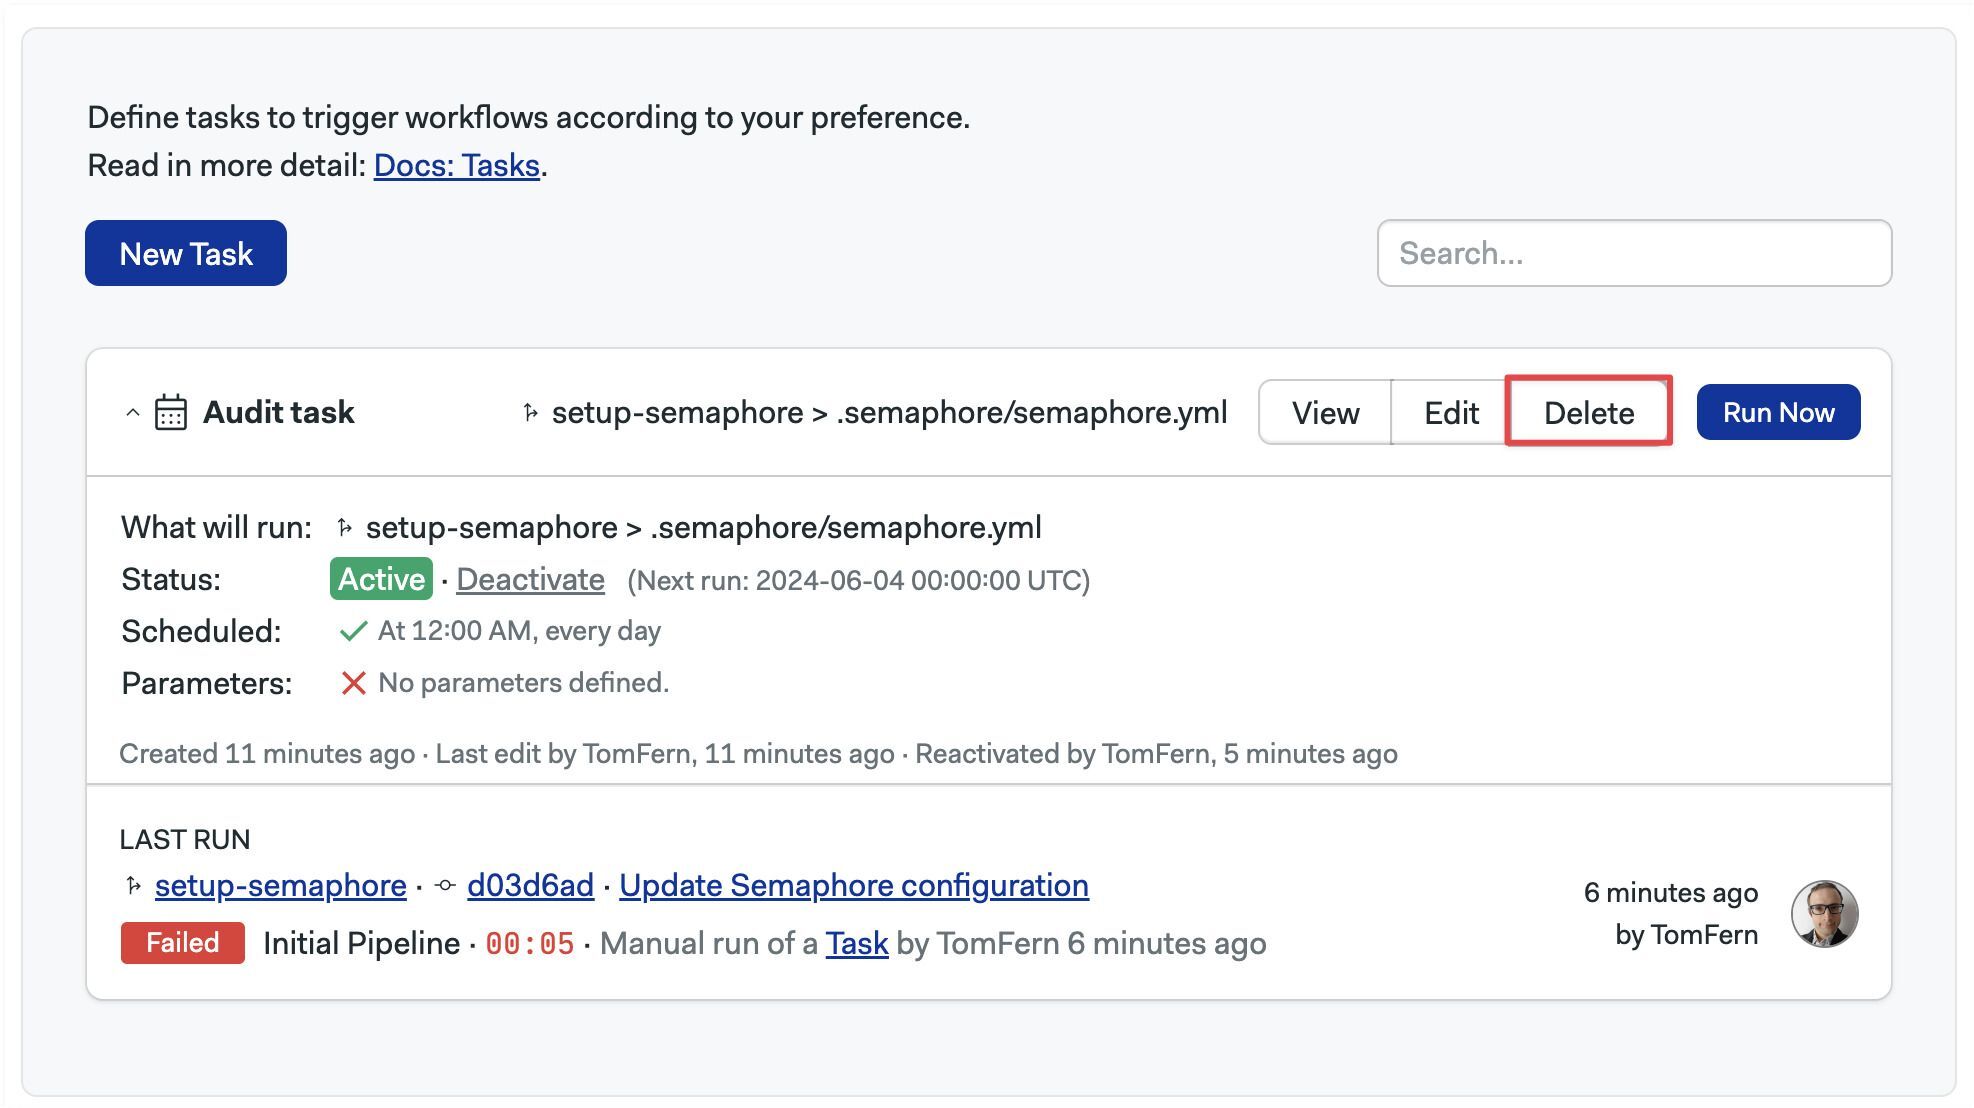
How to delete a task
When you delete a task all the execution history is also deleted. If you want to keep the execution history for the task, you can pause the task. This prevents the task from running automatically.
To delete the task, go to the Tasks tab in your project and press the Delete button.