Managing User Accounts
Semaphore users a Role Based Access Control model to manage permissions at the organization and project level.
Manage your user profile
You can manage your Semaphore user profile details such as email address, username, and access token.
How to change your username
To change your Semaphore username, follow these steps:
-
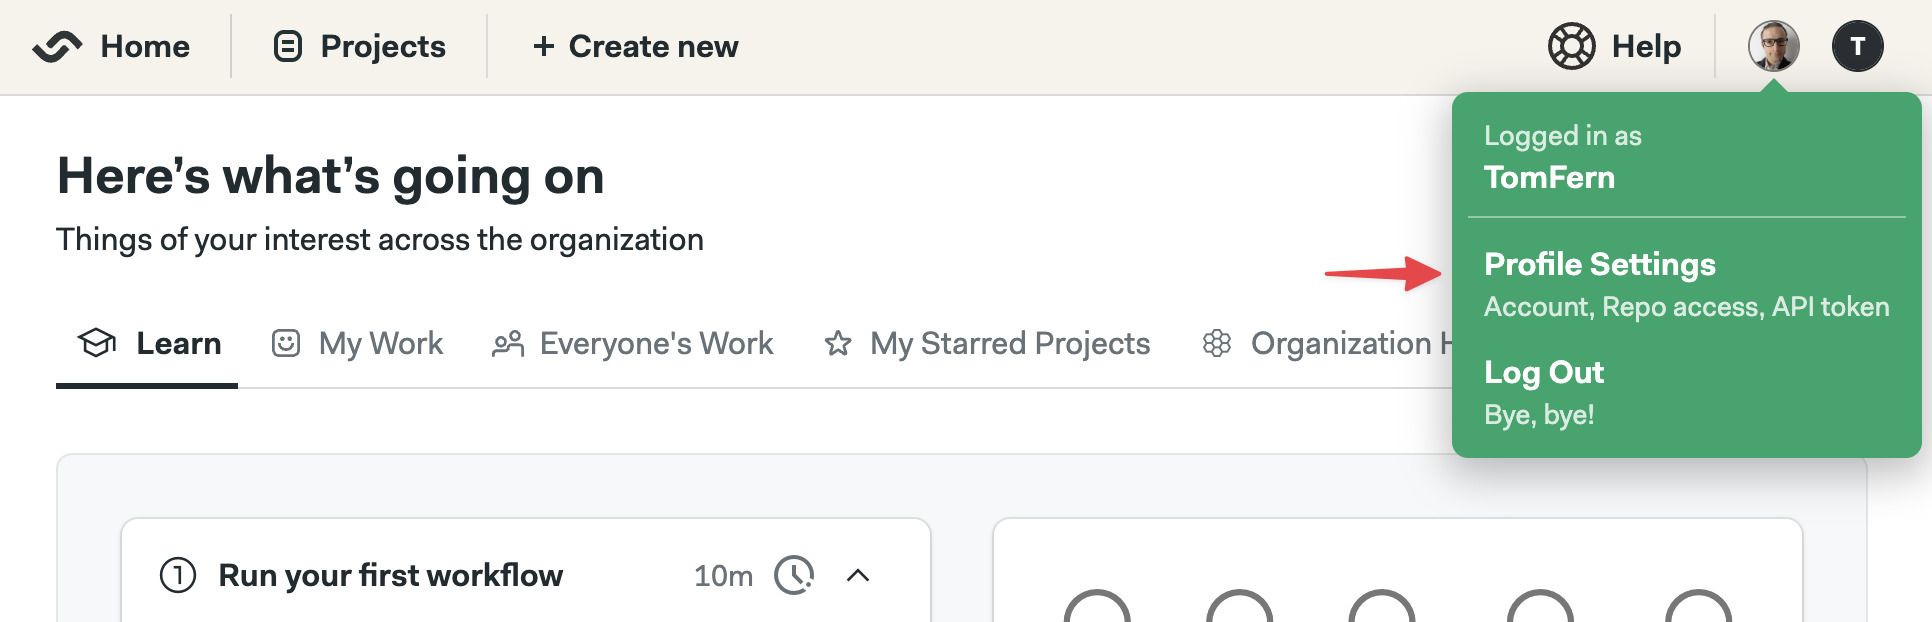
Open your user menu on the top-right corner
-
Select Profile settings
-
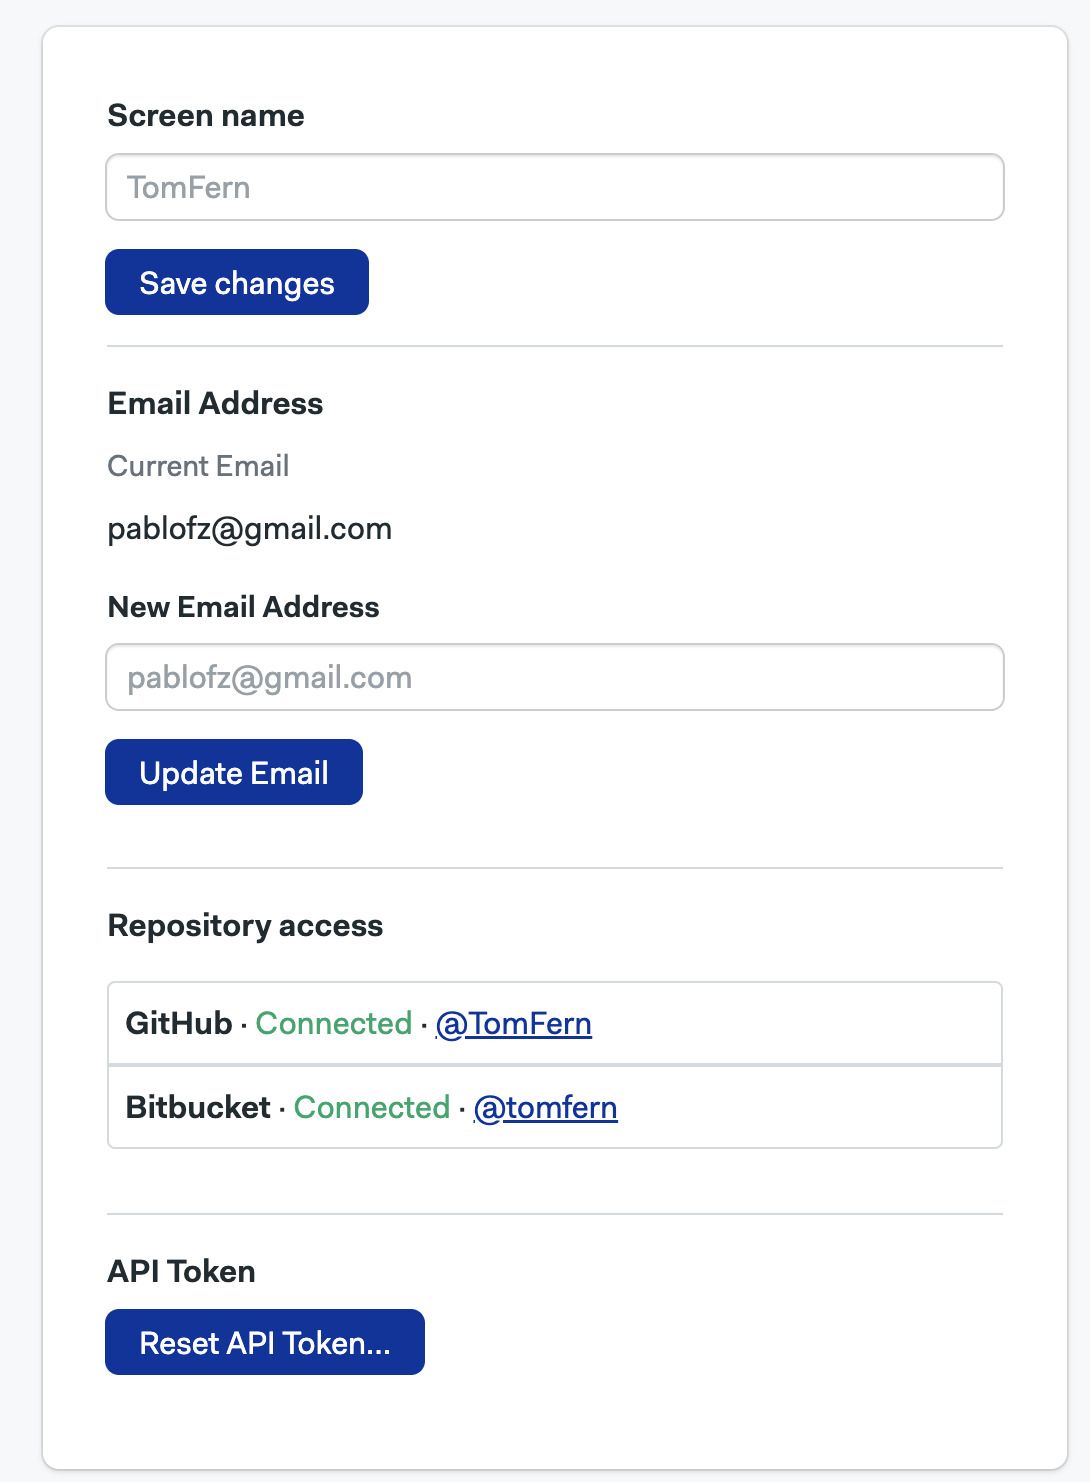
Under Screen name, type your new name
-
Press Save changes
How to change your email address
Changing your user profile email address can revoke access to integrations such as GitHub and BitBucket. You may need to reconnect your repositories after changing your email address.
To change your Semaphore email address, please contact support@semaphore.io from the primary email linked to your GitHub, Bitbucket, or GitLab account used to log in to Semaphore, and include your new email address.
How to reset your personal API token
Changing your access token will revoke access to the Semaphore API and access via the Semaphore CLI. Only reset your token if you have lost access to it or suspect someone else has been using it on your behalf.
To reset your Semaphore API token, follow these steps:
-
Open your user menu on the top-right corner
-
Select Profile settings
-
Under API Token press Reset API Token
-
Confirm the change, copy the new to token and save it on a safe place
How to delete your user account
Deleted user accounts cannot be restored. There is no undo for this operation.
To permanently delete your user account, follow these steps:
-
Open your user menu on the top-right corner
-
Select Profile settings
-
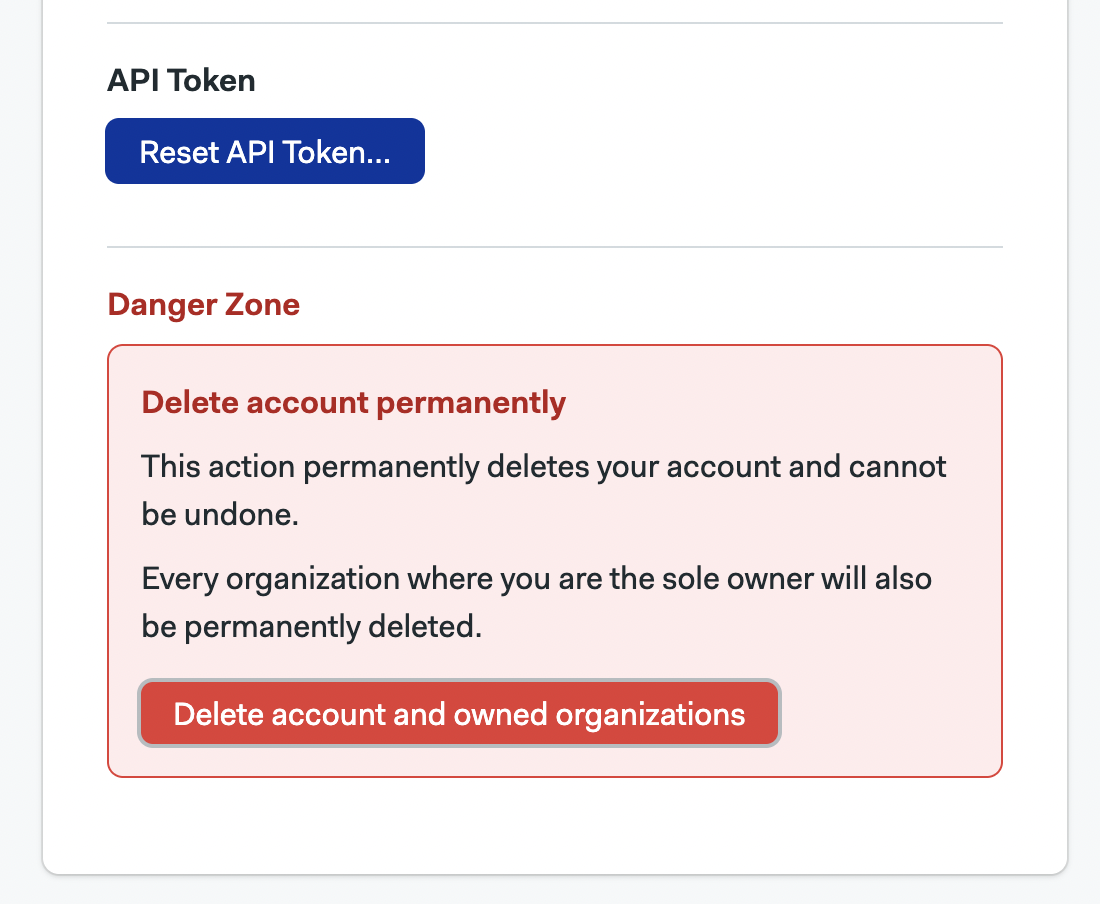
Under Delete account permanently press Delete account and owned organizations
-
Confirm the change.
In case you lose access to your Semaphore account, you can send an email to support@semaphore.io from the primary email address associated with your GitHub, Bitbucket, or Gitlab account used to log into Semaphore, confirming you'd like to delete your user account.
Managing Semaphore users
Semaphore users a Role Based Access Control model to manage permissions at the organization and project level.
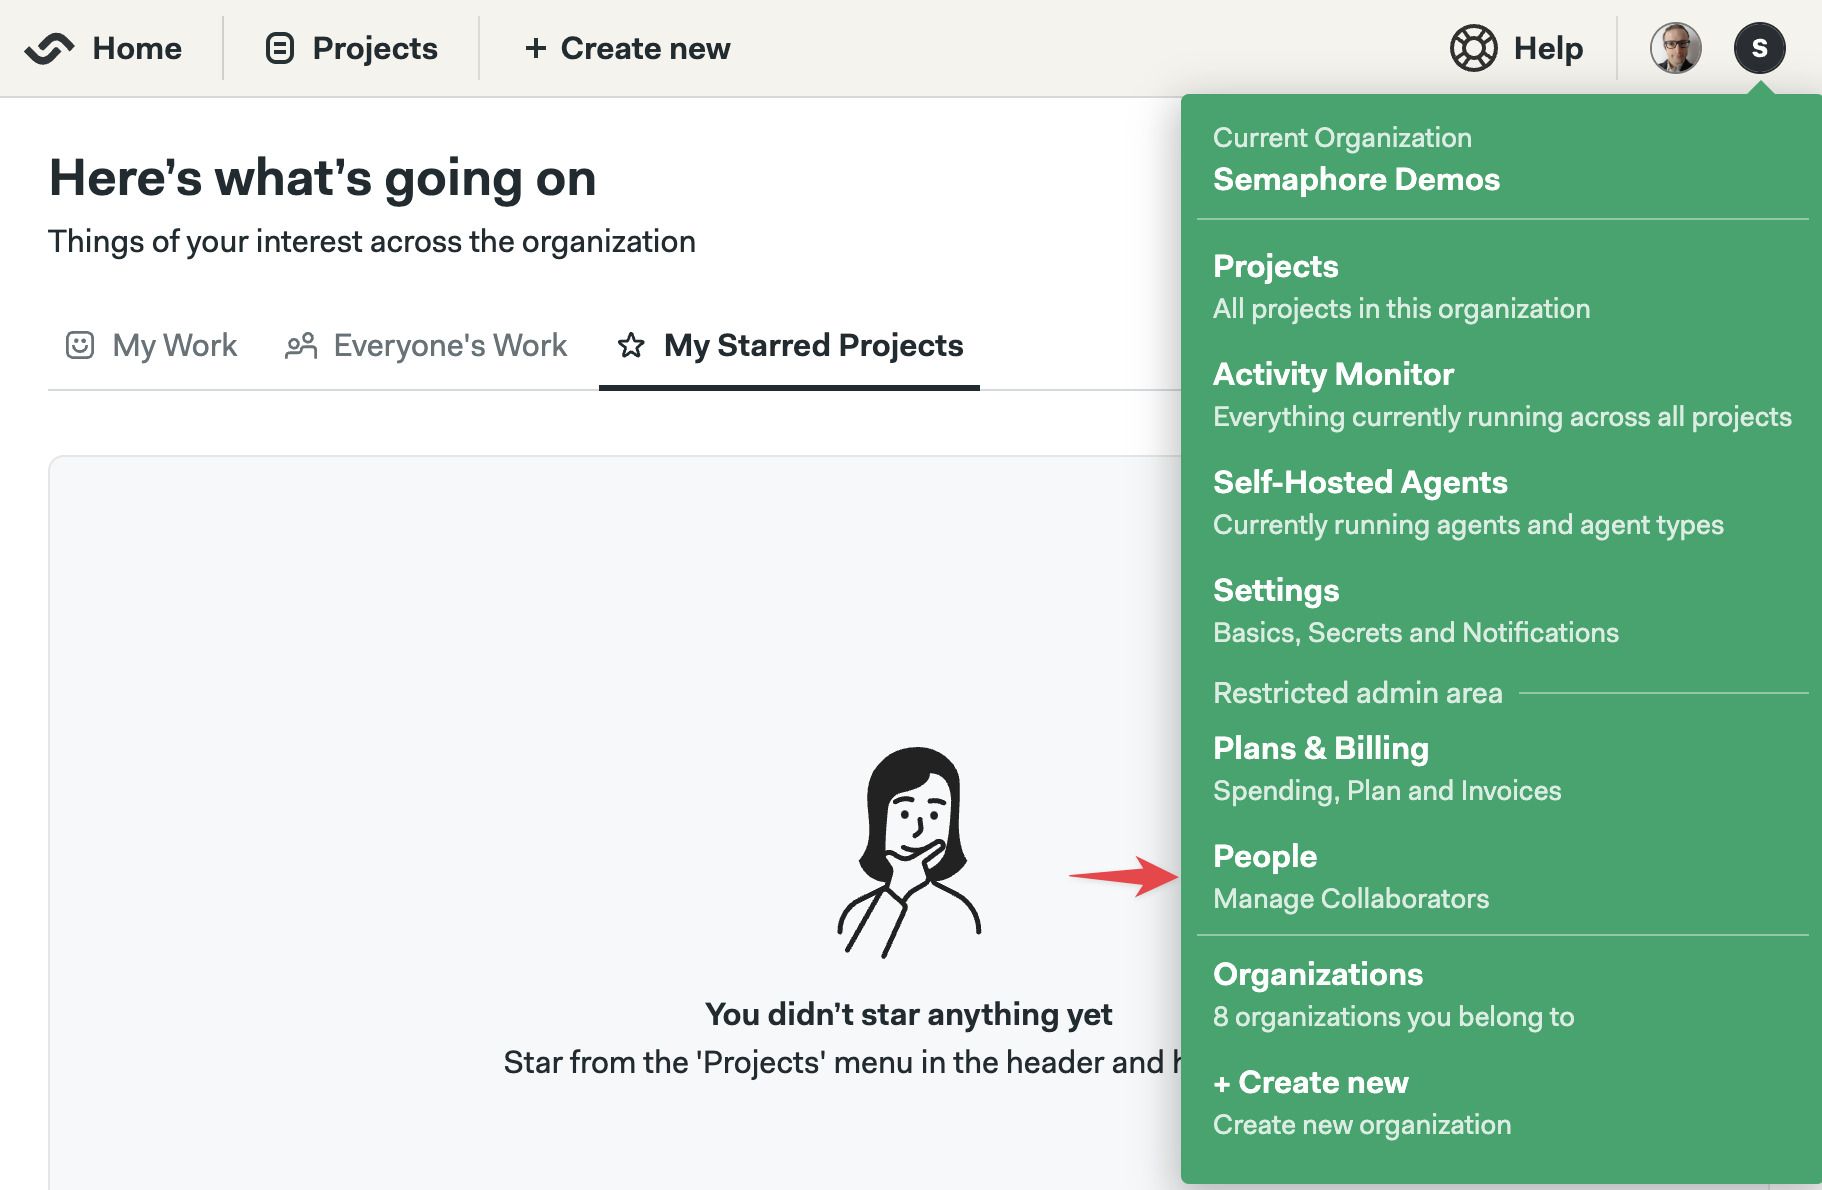
To manage users in your organization, open the organization menu and select People. This tab shows users and groups in your organization along with their roles and groups.
How to invite users
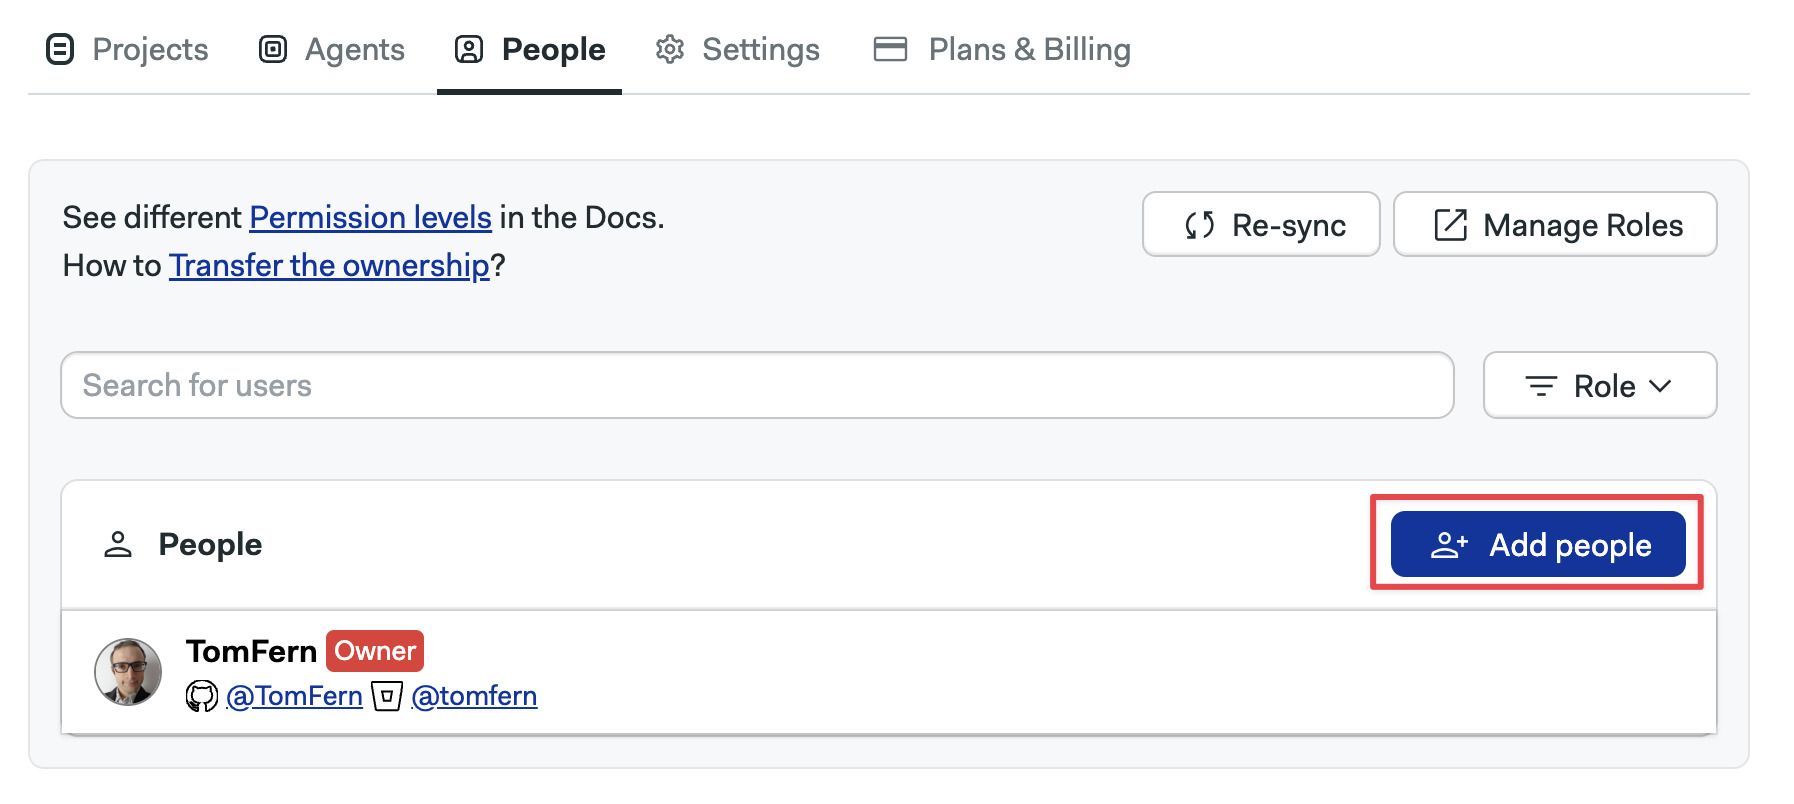
To invite a user to your organization, press the Add people button:
-
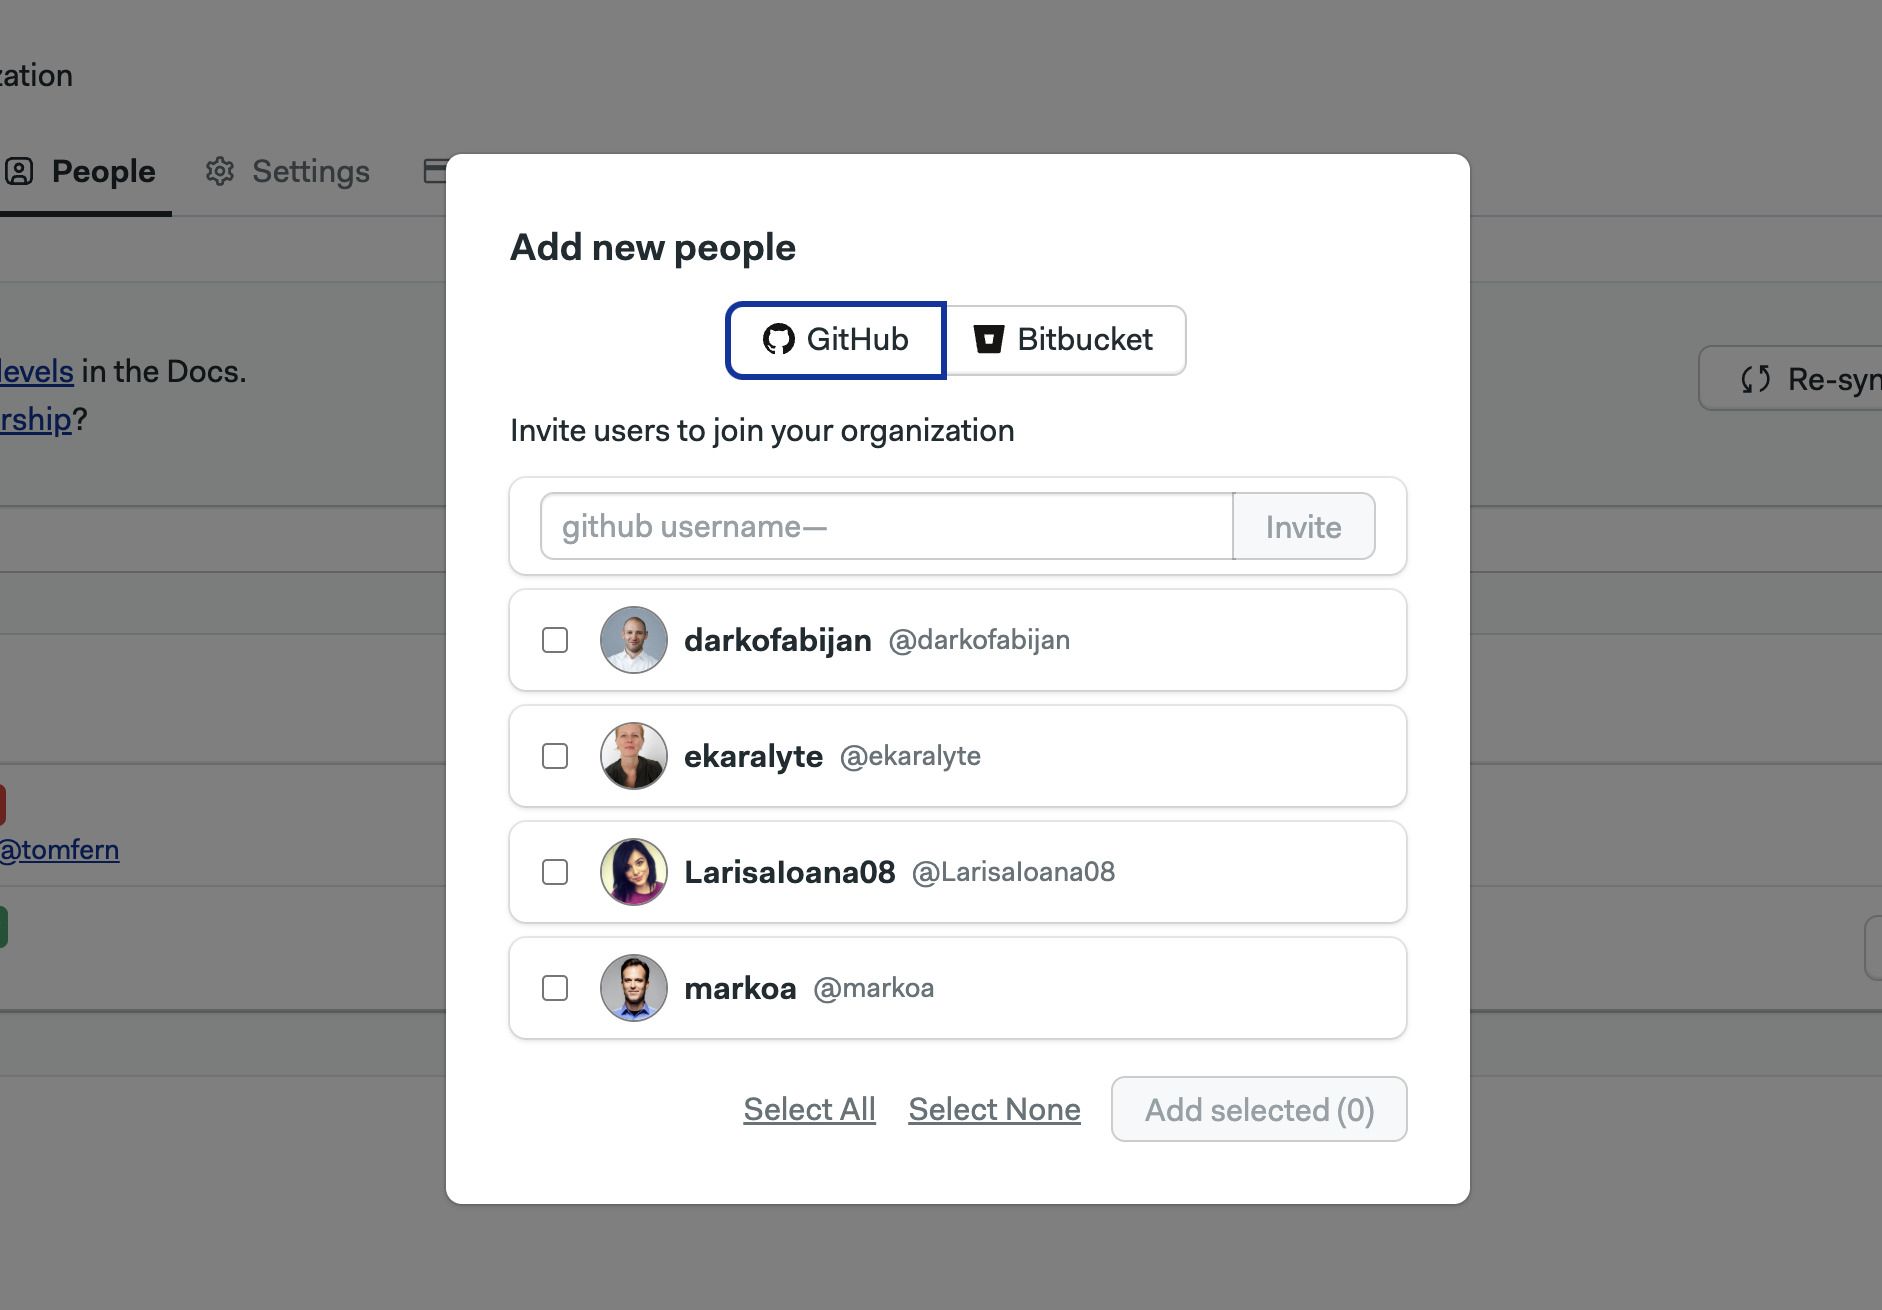
Select one of the available tabs
- Type the user's handle, e.g.
TomFern, or select the user from the list. Usernames are case-sensitive and all characters are considered. Ensure the handle is entered accurately to avoid errors. - If you don't see the user in the list. Ensure they have repository access in GitHub or BitBucket for at least one project in your organization.
- Type the user's handle, e.g.
-
Press Add selected
-
Optionally, set their role
In case you run into a 401 error when adding a user, please attempt the following steps:
- Go to your Semaphore account page and ensure the GitHub status of your account is marked as "connected". This will ensure you have the ability to send invitations. In case it's marked as "Not connected" here's how you can correct it: Connect GitHub: Troubleshooting guide
- Ensure the user has repository access in GitHub or BitBucket for at least one project in your organization and then click on the "re-sync" button located in the People page.
- Wait 2-5min and then try to invite the user again.
How to remove users
Users can only be removed from the organization when they don't own any projects. You must transfer the ownership of all the user's projects before they can be removed from the organization.
To remove a user, go to the people option in the organization menu and follow these steps:
- Transfer any project ownership the user may have to another individual. The user must not own any projects
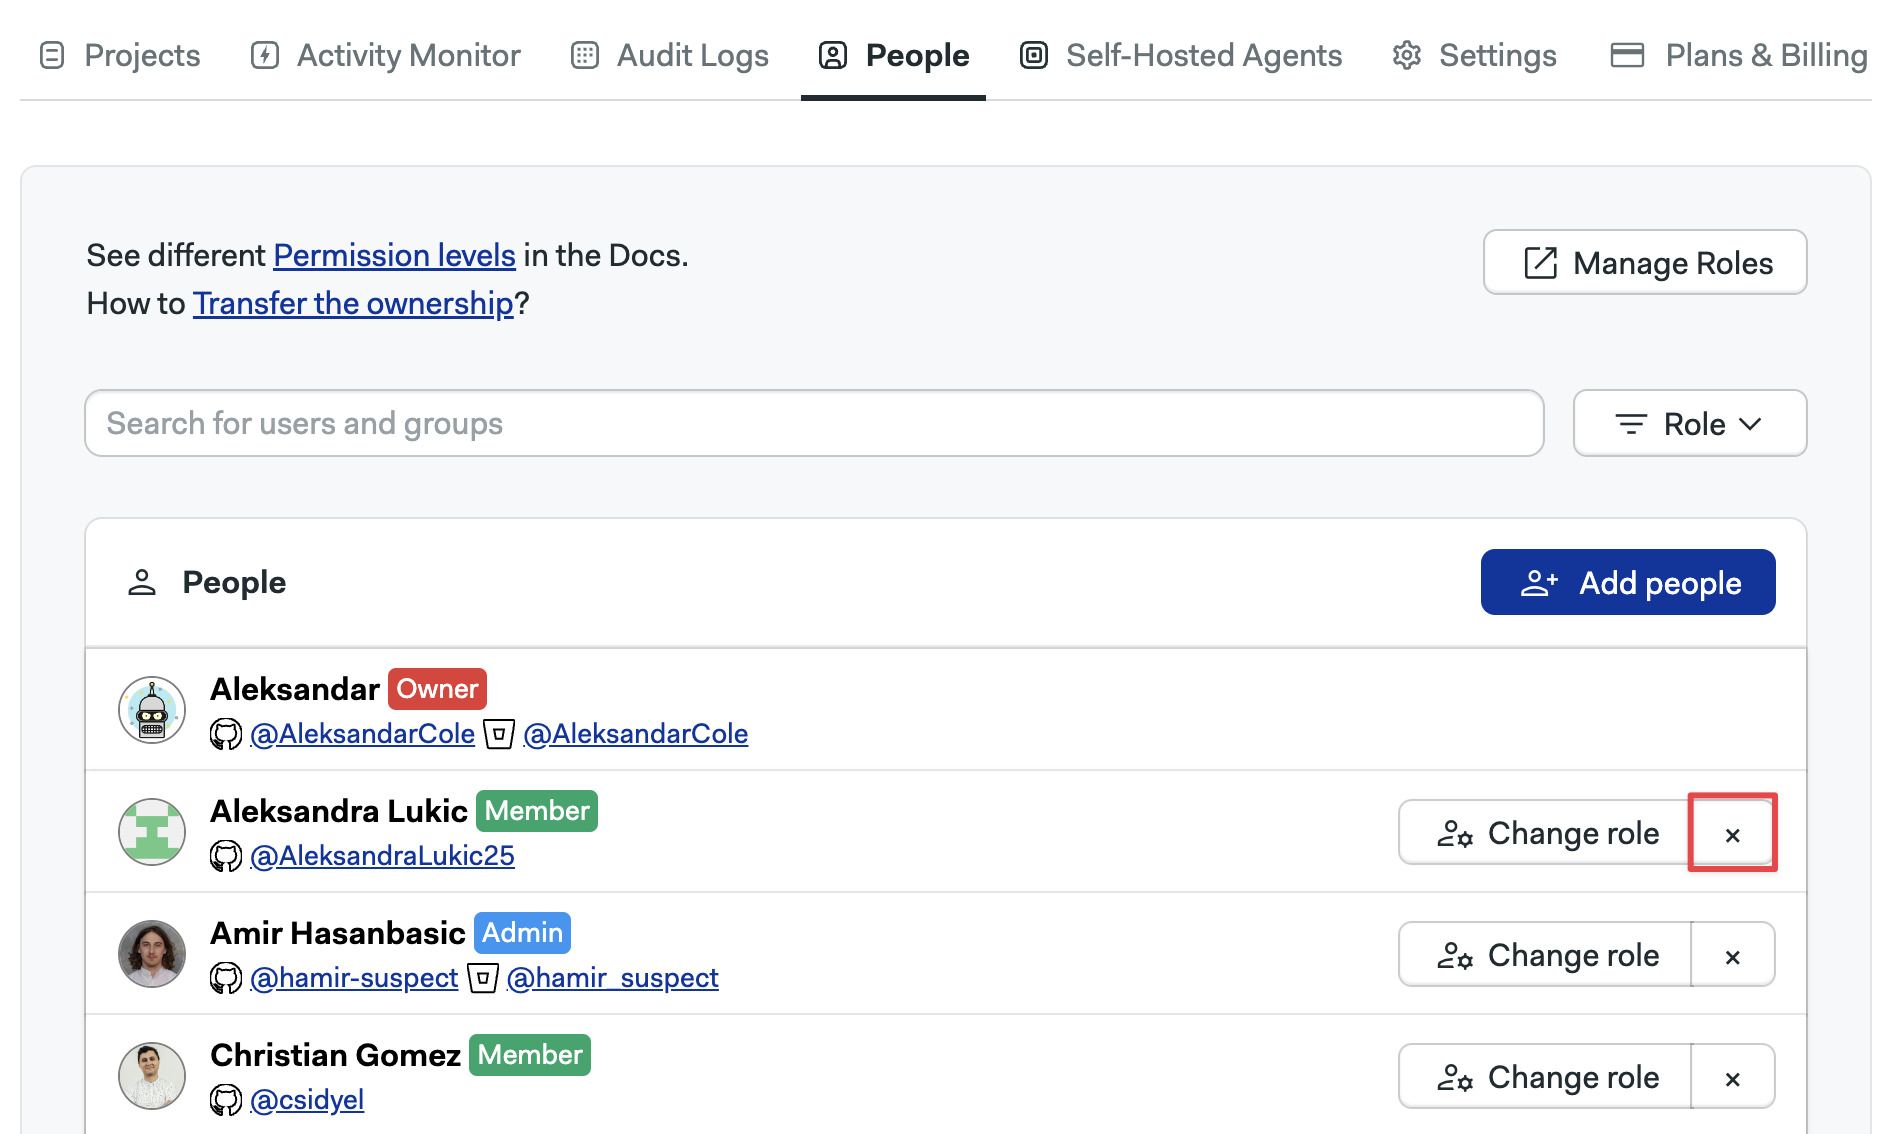
- Press the X button next to the username of the user you want to remove
Upon removal, access to all projects in the organization are revoked.
Only an Admins, Owner, or dedicated custom roles can remove users from the organization.
How to download list of users as CSV
Organization owners and admins can export a list of all users in their Semaphore organization.
To download the list, follow these steps:
-
In the People section, press Download .csv

-
Semaphore will generate a .csv file containing the following user details:
- Semaphore account name
- Email address
- GitHub username
- Bitbucket username
- GitLab username
How to change user roles
To change the role of a user, press the Change Role button next to the person.
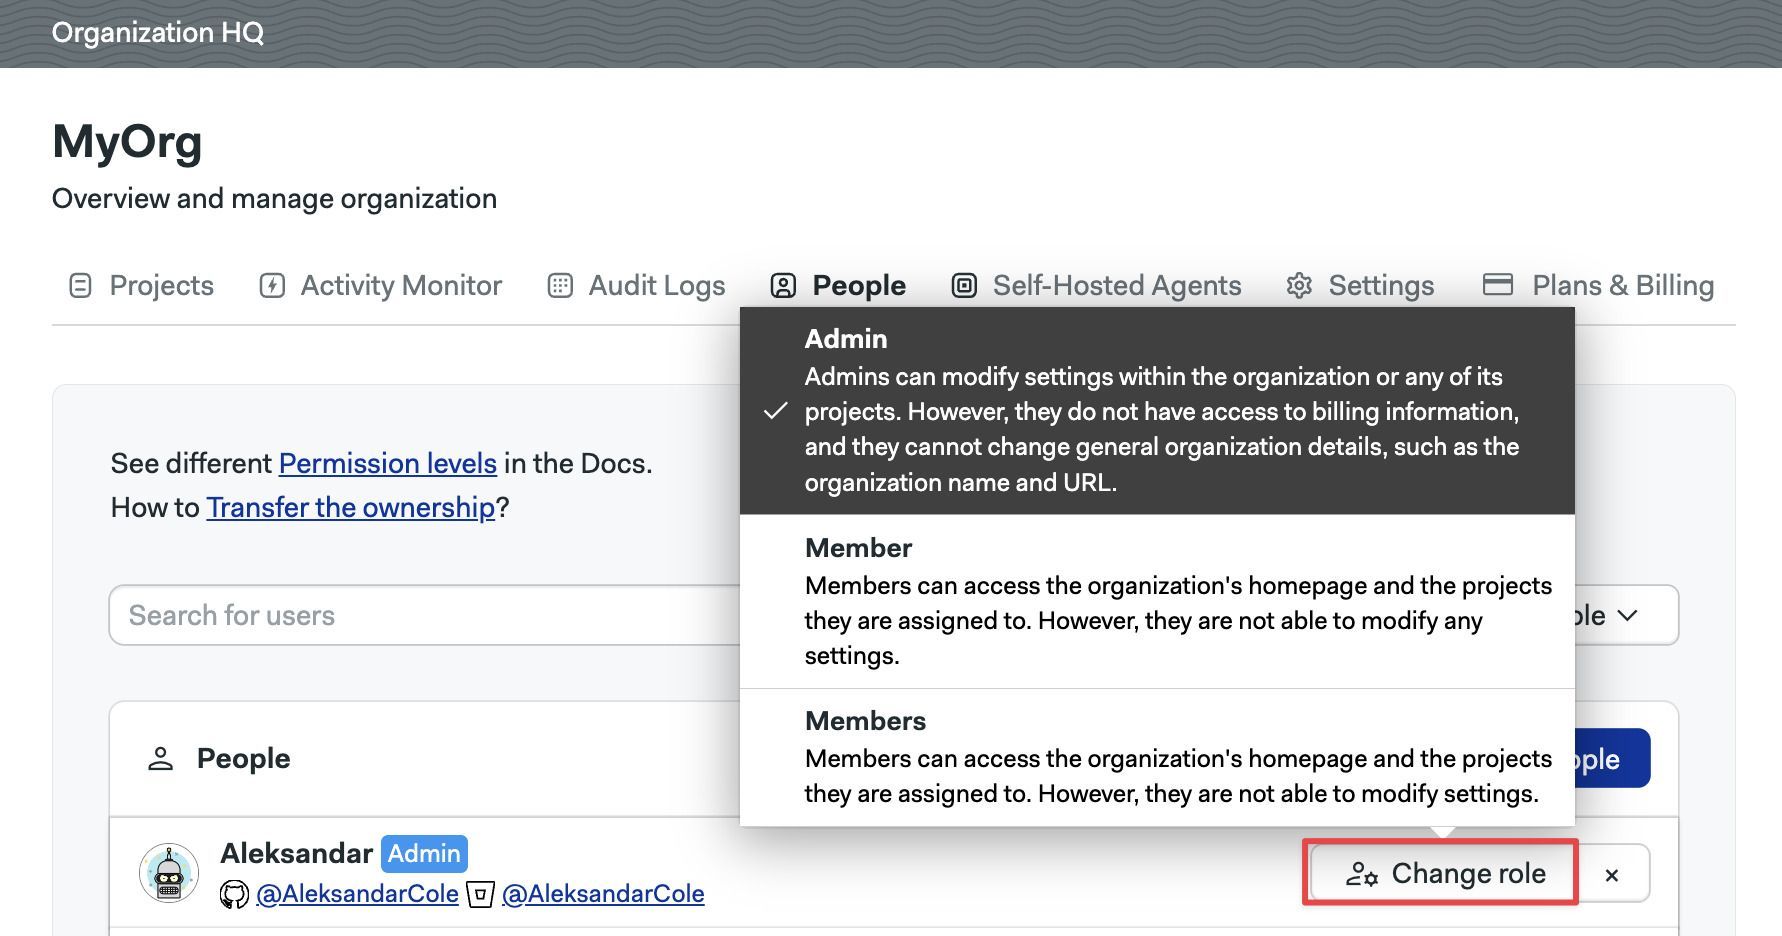
See organization roles to learn what roles are available.
How to create groups
User groups streamline user management by allowing bulk actions. After creating a group, you can:
- Add members to the group
- Assign a role to the group
All members of the group automatically inherit the permissions associated with the assigned role.
As an example, let's say you want to give the Finance team access to the Billing pages in your organization. To achieve that you can:
- Create a custom role with view permissions on the Billing page
- Create a Finance group
- Assign the new custom role to the group
- Add everyone in the Finance team to the group
- As the team changes, you can add or delete persons from the group
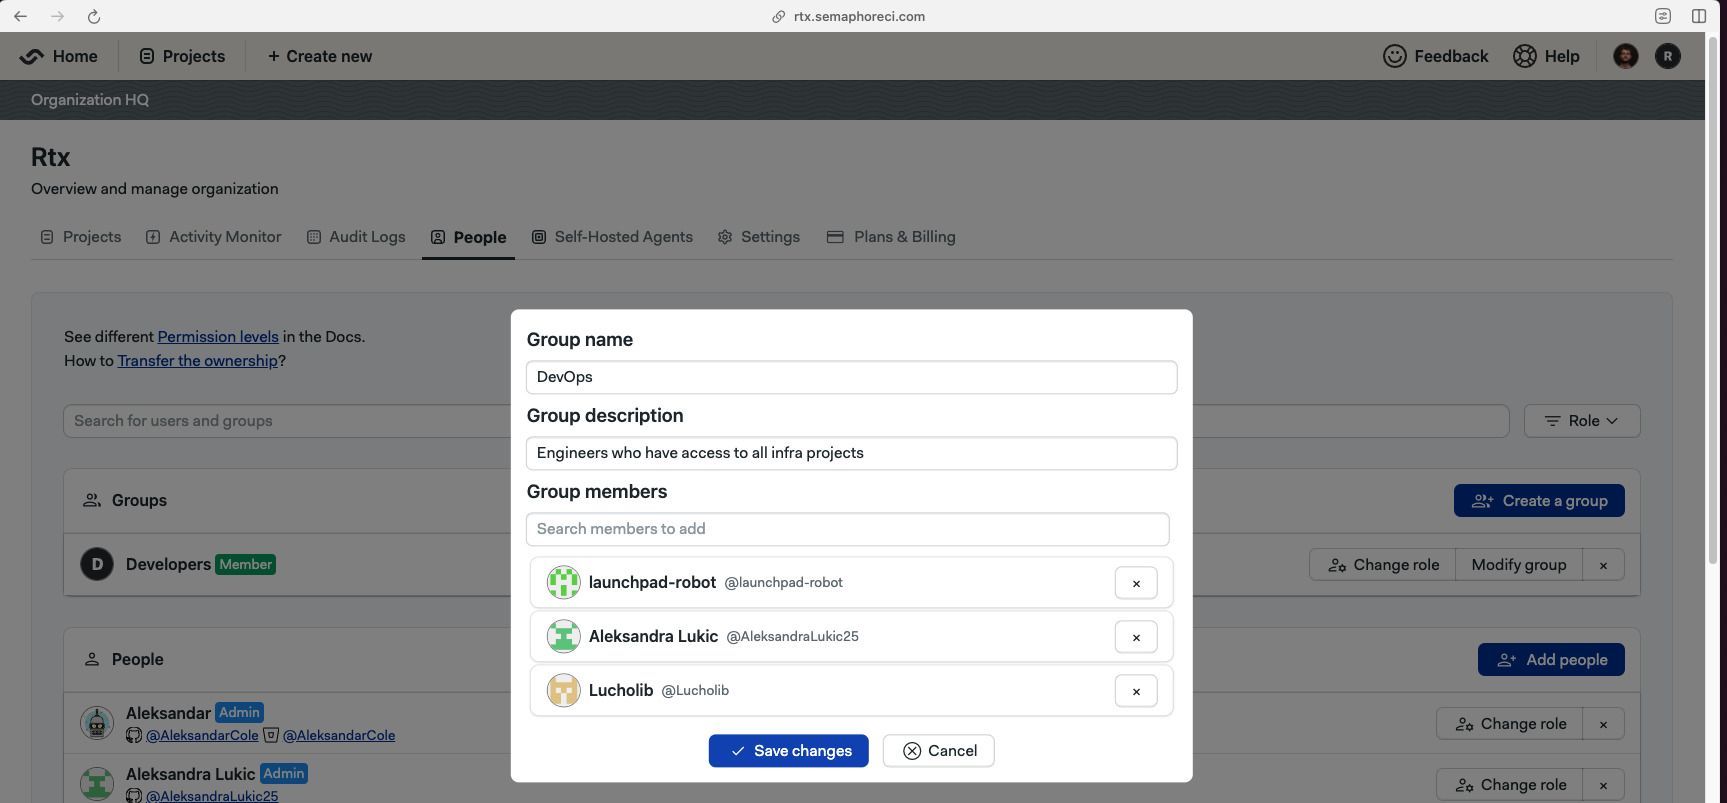
To create a group, open the organization menu and select People.
- Press on Create group
- Type in the group name and description
- Type the names of the persons to add to the group
- Press Save changes to create the group
The new group has the member role by default. You can change it by pressing the Modify Role button and selecting a different role.
You can also define custom organization roles if none of the pre-defined roles suit your needs.
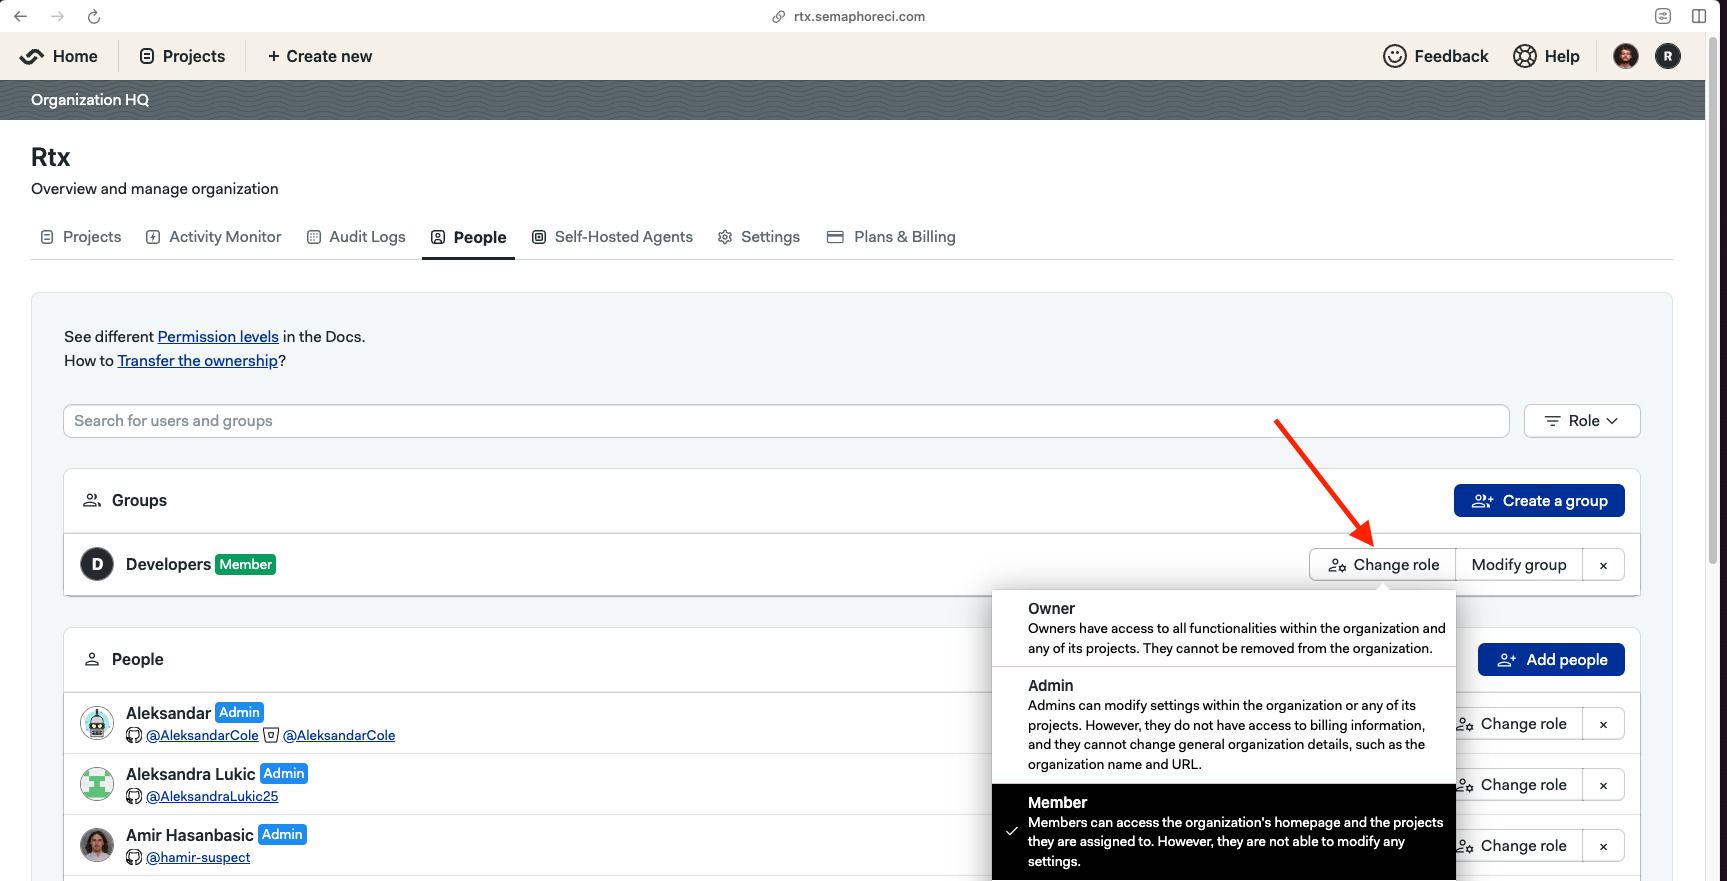
How to change group roles
To change the role of a group, press the Change Role button next to the group.
How to add members groups
To add or remove users in a group, press the Modify group button next to it.
- Press the X button to remove the user from the group
- Type the name of the persons you want to add to the group
- Press Save changes to finish editing the group
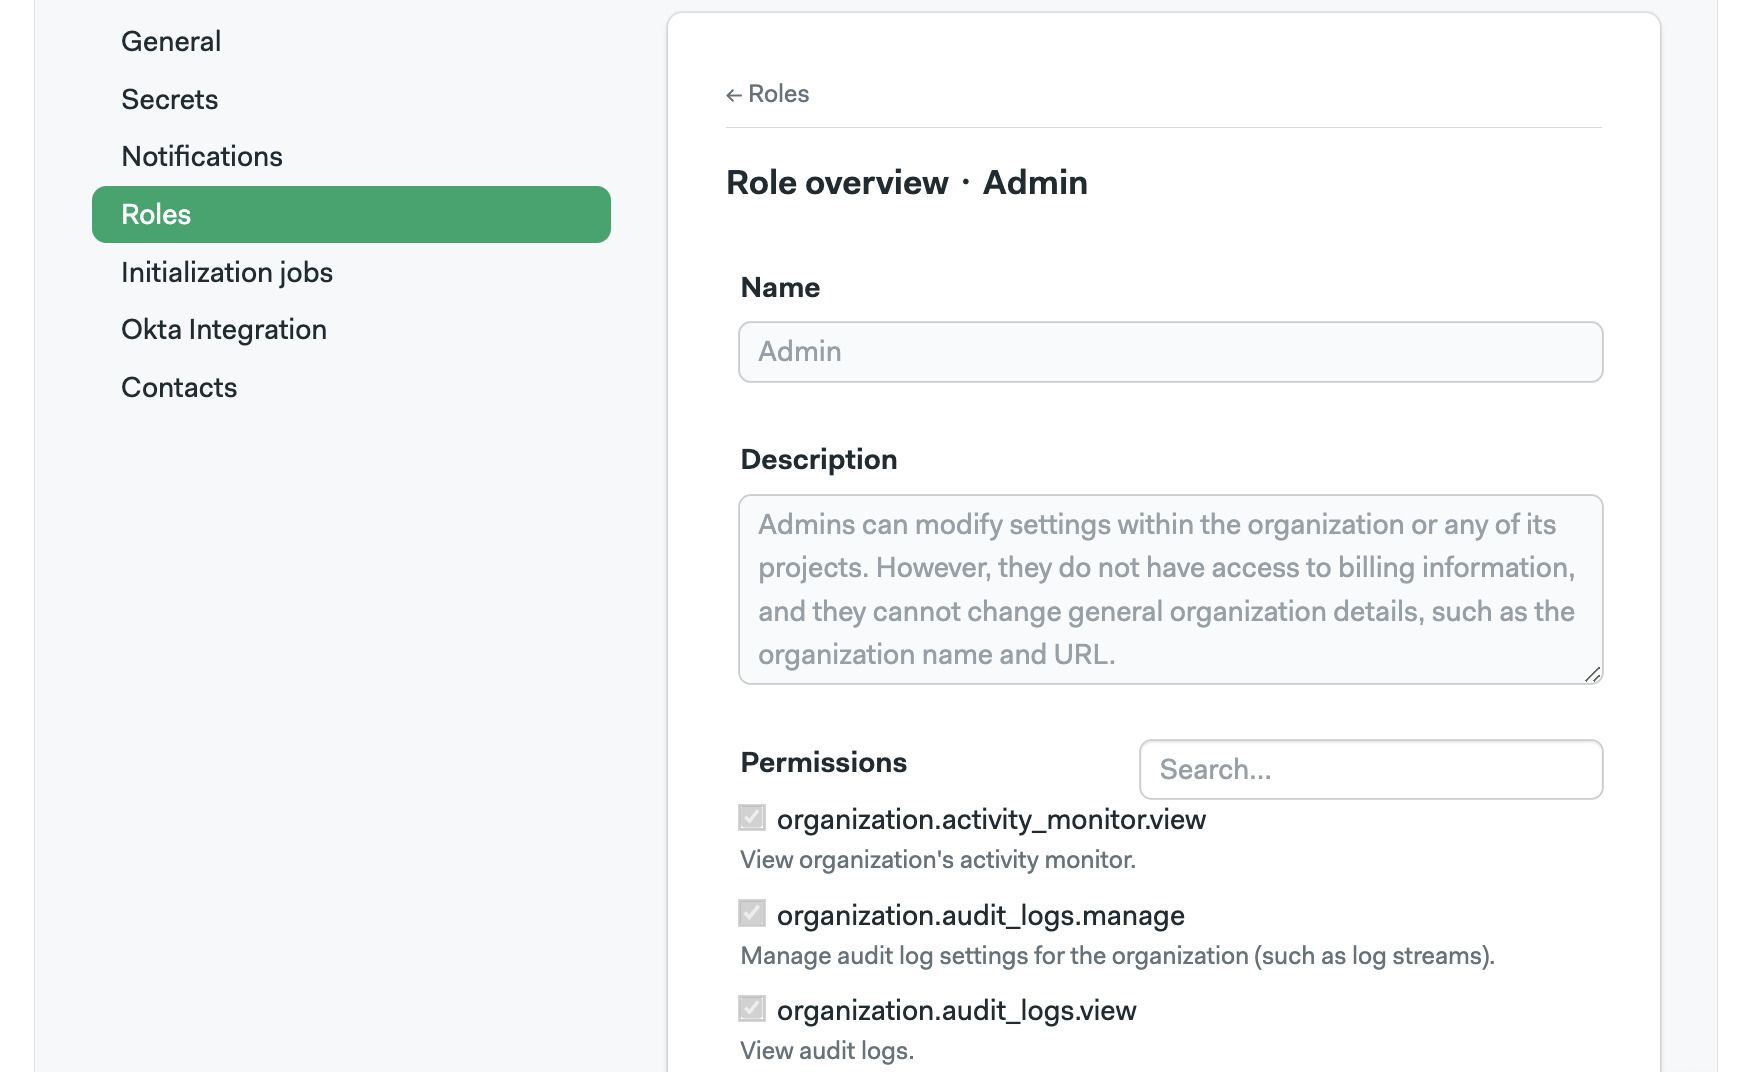
How to view pre-defined roles
Semaphore provides pre-defined roles for organizations. You can see what actions each role can perform by following these steps:
- Open the Organization Settings menu
- Select Roles
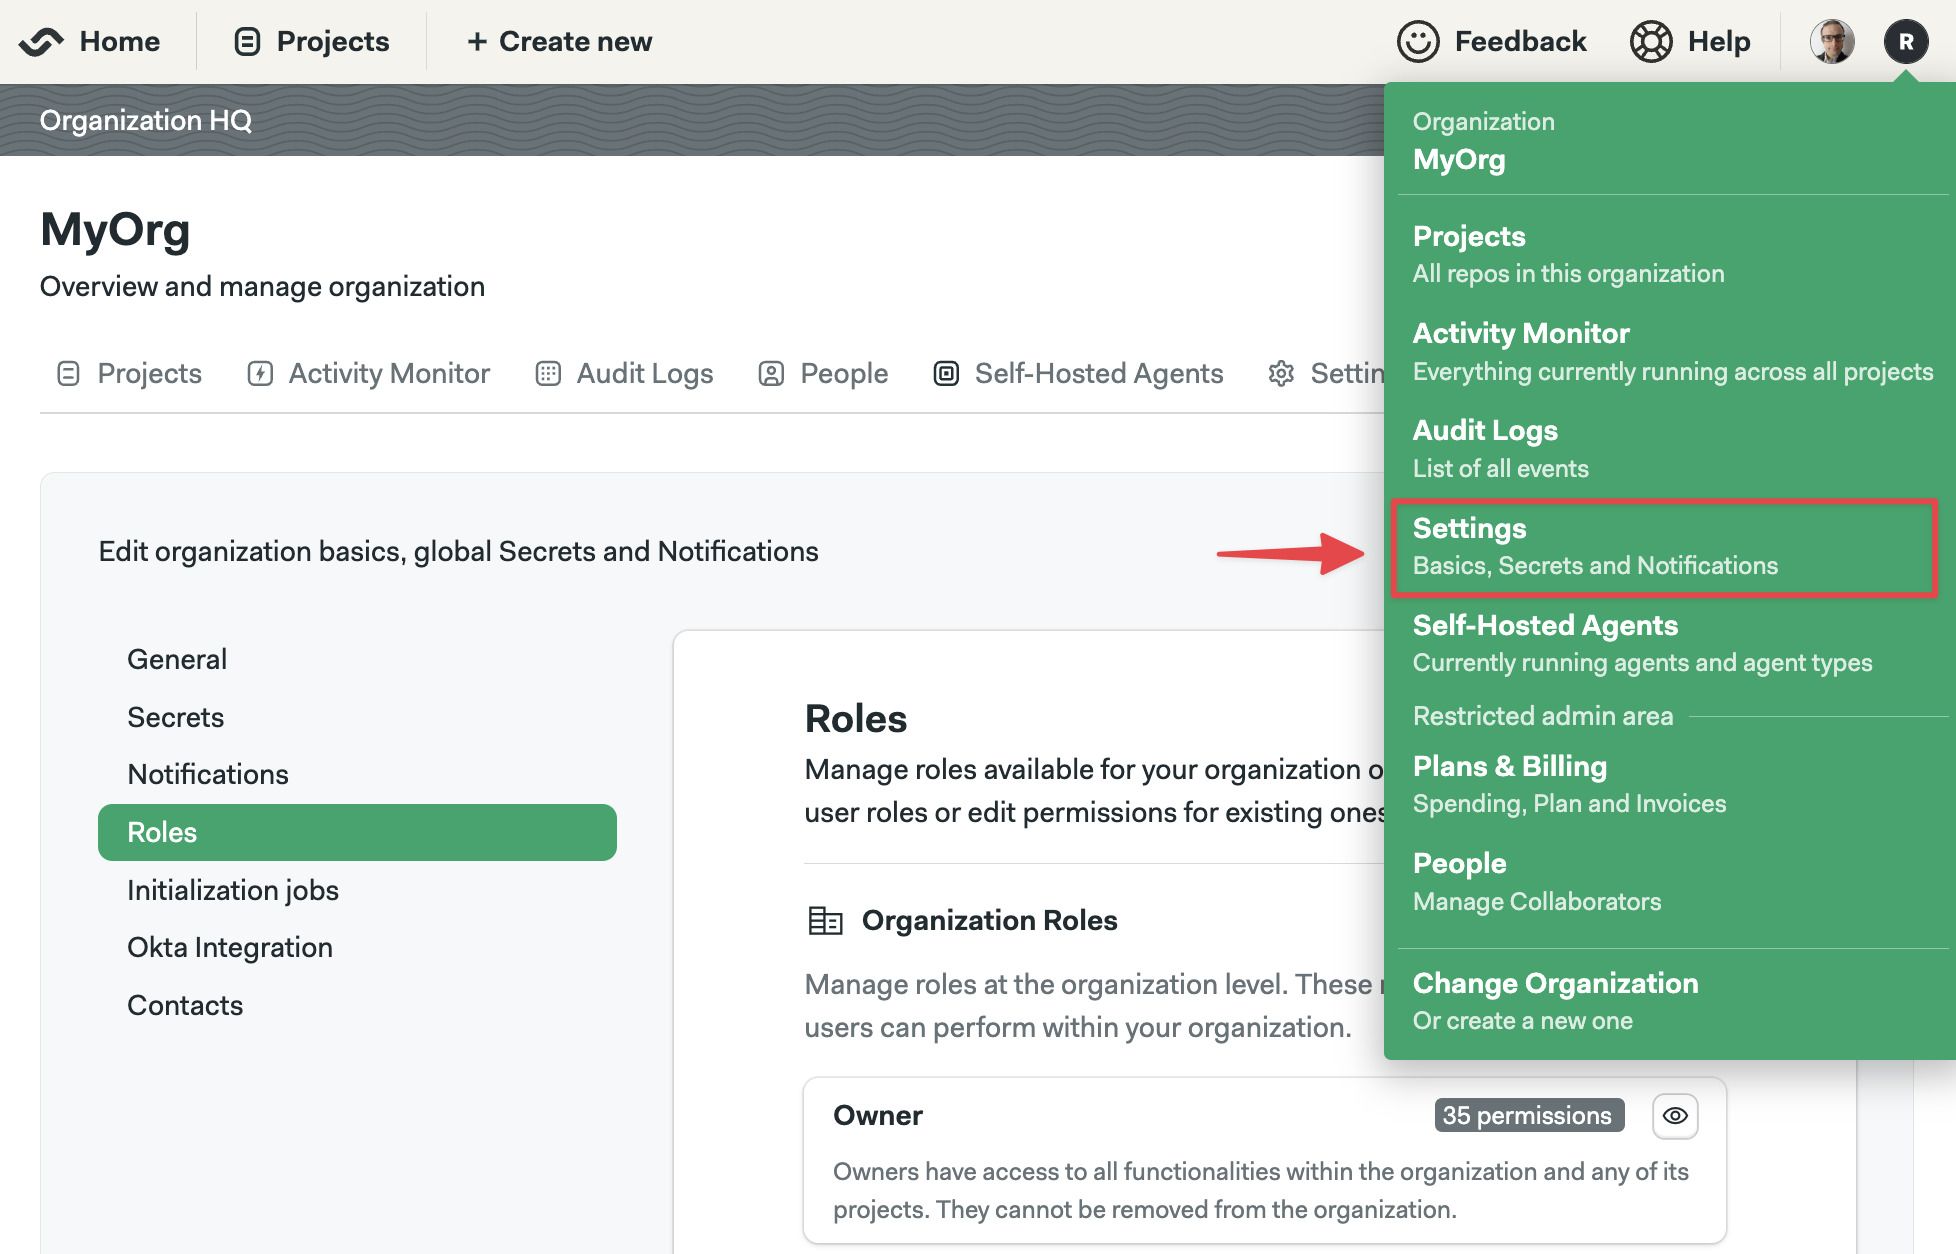
- In the Organization Roles section, press the eye button next to the role you want to examine
The actions with enabled checkbox are allowed for that role.
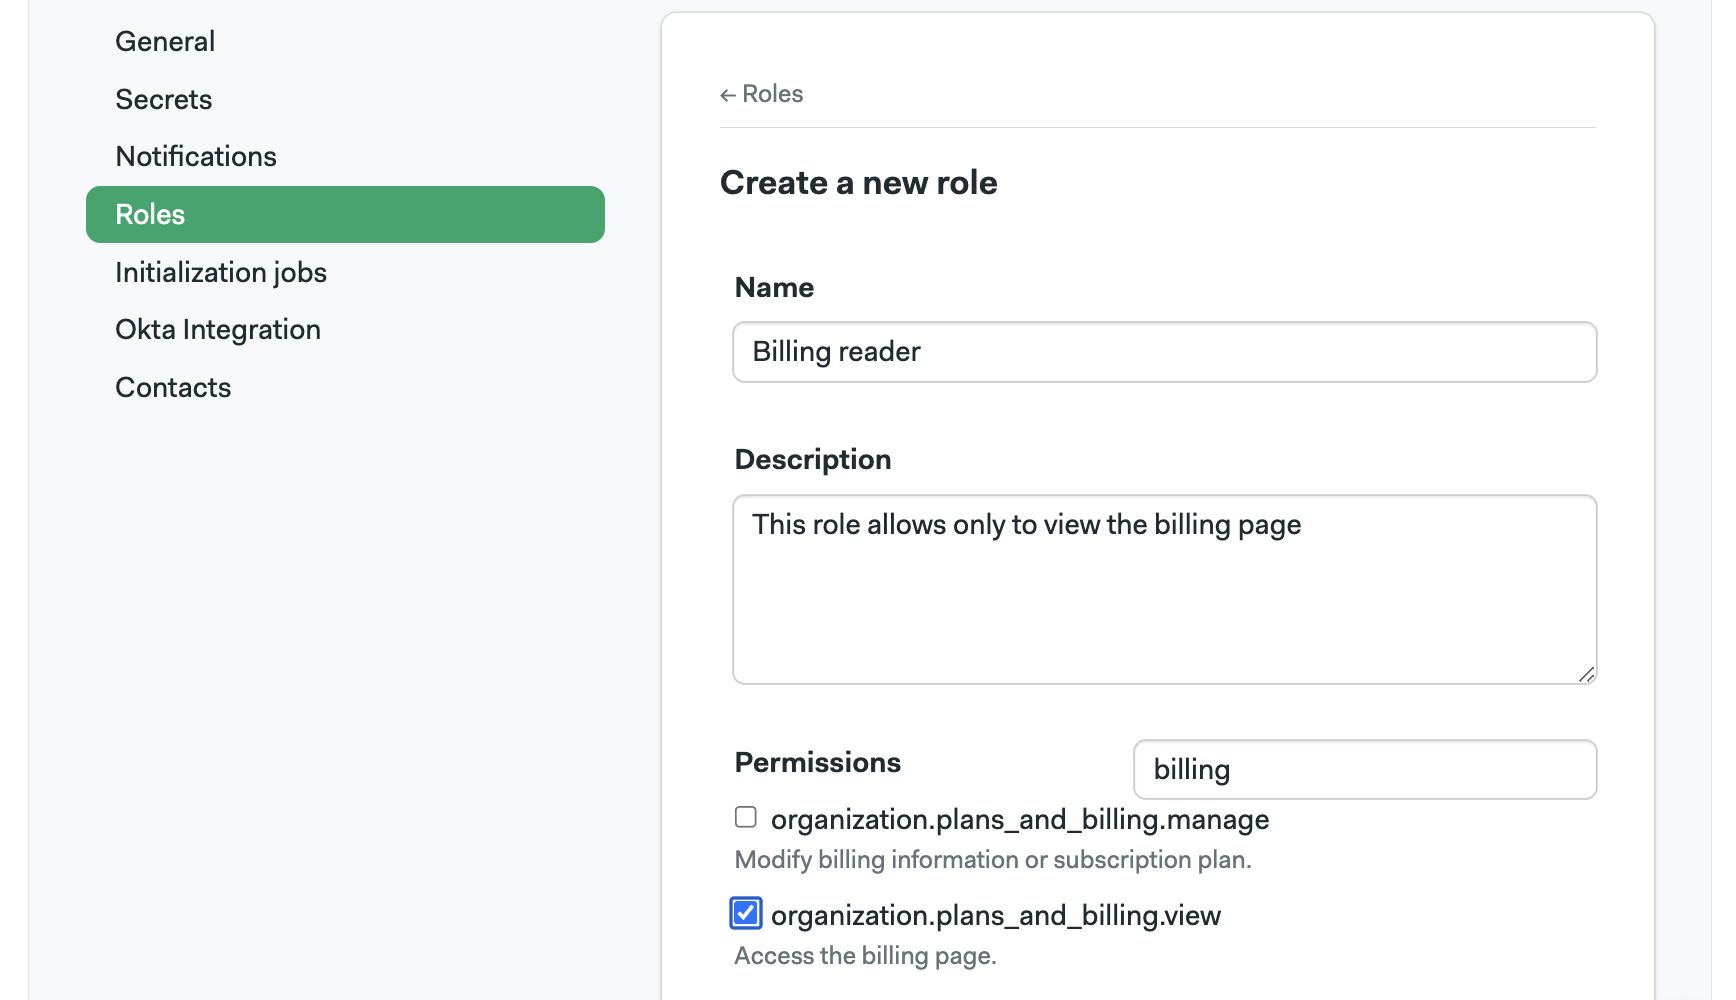
How to create custom roles
Create custom roles to give your users the precise permissions they need.
- Open the Organization Settings menu
- Select Roles
- On the Organization Roles section, press New Role
- Give a name a description to the new role
- Enable the permissions allowed to the role. You can use the search box to narrow down options
- Press Save changes