Self-healing Pipelines
This page shows how to implement self-healing CI pipelines using an AI agent and the Semaphore MCP server. If you need a more tailored solution, please get in touch with support, and we can help you set up a self-healing workflow for your projects.
In this scenario, we use OpenAI's Codex inside the CI to fix build errors and automatically create a Pull Request. You can swap Codex with a different AI agent with minimal changes.
If you prefer to use GitHub's Cloud version of Copilot, where the AI Agent runs inside GitHub instead, see Copilot Agent Integration
Overview
AI Agents such as OpenAI Codex or Claude Code can diagnose and fix test errors inside your CI. When coupled with Semaphore's MCP server, these agents can implement, push fixes, and create pull requests automatically when a build fails.
Self-healing pipelines solve the often tedious process of figuring out why tests run in your machine but fail in the CI. If the build fails, you can expect to have a PR with the fix ready to merge.
The self-healing process works in this way:
- You have a regular CI pipeline that builds and tests your application
- You add a promotion that triggers the self-heal pipeline when the CI fails
- The self-heal pipeline spins up an AI agent. The agent pulls the job logs using Semaphore's MCP and implements a fix
- The self-heal pipeline pushes the fixed code into a separate branch
- The push triggers a new CI build. If the pipeline passes, a PR is automatically submitted to GitHub for your evaluation

Prerequisites
- Semaphore MCP Server enabled and configured in your organization
- A GitHub Personal Access Token with write permissions on the repository
- An API token for your AI Agent of choice
Preventing build loops
Whenever we push into the repository from inside the CI environment, we risk entering into a loop. In this solution, we present two mechanisms:
- Always run the self-heal pipeline manually, i.e., without autopromotion
- Enable autopromotions, but use conditions to avoid triggering on branches created by previous self-heal runs
Preparation
Before you can set up self-healing pipelines, there are a few preparation tasks.
Enable MCP Server
-
Enable the MCP Server in your Semaphore organization, so the agent can pull build data and job logs.
-
Create or obtain a Semaphore API token to connect with the MCP Server. Both personal tokens and service accounts work as API tokens
-
Create a secret called
semaphore-mcpwith the environment variableSEMAPHORE_API_TOKENto store your Semahore token
Obtain API Token and configure Codex
In this example, we'll use OpenAI Codex, but you can easily swap the agent if you're using a different service.
-
Obtain an OpenAI API Token
-
Create a secret named
openai-apiwith the environment variableOPENAI_API_KEYto store your OpenAI API token -
Create a directory in your repository called
selfheal/codex:mkdir -p selfheal/codex -
Add the following Codex configuration file to
selfheal/codex/config.tomlCodex configurationfull-auto = true
bypass-approvals = true
bypass-sandbox = true
trusted-workspace = true
[mcp_servers.semaphore]
url = "https://mcp.semaphoreci.com/mcp"
bearer_token_env_var = "SEMAPHORE_API_TOKEN"
startup_timeout_sec = 30
tool_timeout_sec = 300 -
Create a prompt template file. This is a basic prompt that can be augmented to fit your project's needs
Minimal prompt template for the AI AgentFind out why the Semaphore in the following pipeline has failed and implement a fix. Analyze all the jobs that have failed and fix all the errors one at a time.
Organization ID: $SEMAPHORE_ORGANIZATION_ID
Project ID: $SEMAPHORE_PROJECT_ID
Pipeline ID: $SEMAPHORE_PIPELINE_ID
Workflow ID: $SEMAPHORE_WORKFLOW_ID
When done, create a file called `commit-message.txt` with a one-line summary of changes suitable for a Git commit message. -
Push the
selfhealdirectory and its contents to your GitHub repository
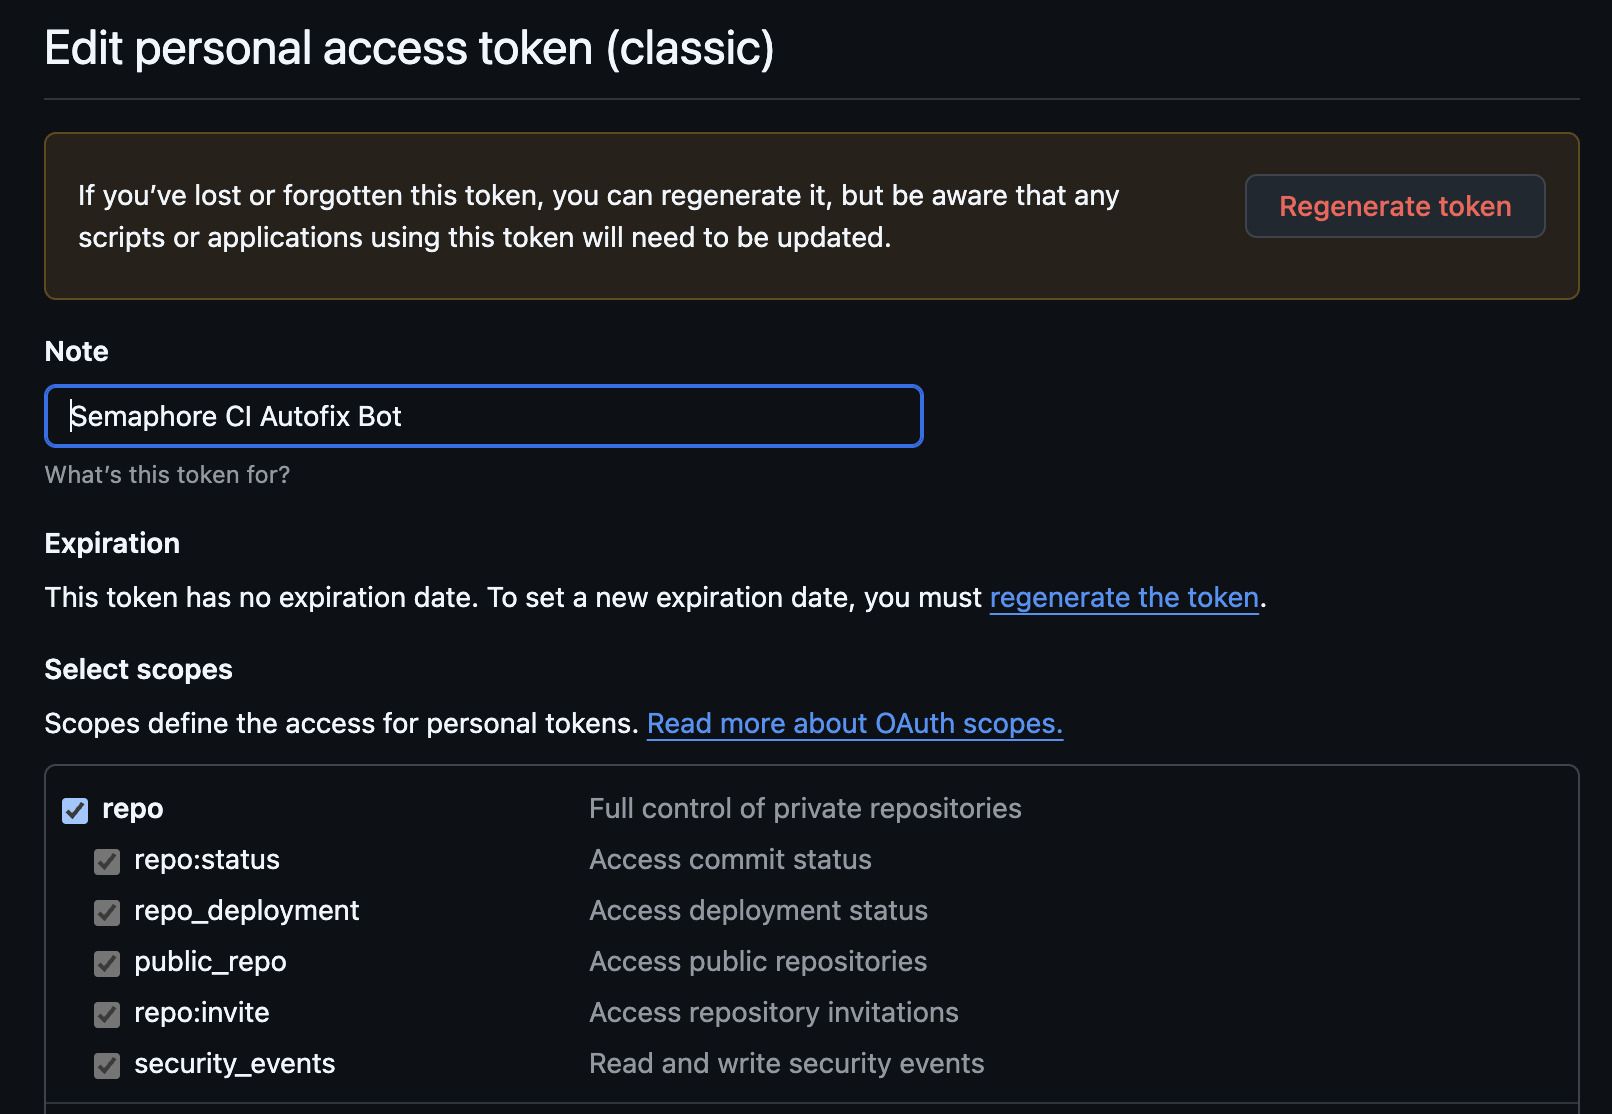
Obtain a GitHub Access Token
By default, the CI machine does not have write access to the repository. We need an additional API token to write from inside the CI environment.
-
Create a Personal Access Token (classic) in GitHub with:
- write permissions to the repository
- permissions to create pull requests in the repository
-
Create a secret called
github-patwith the environment variableGITHUB_TOKENto store your GitHub token
Set up Self-healing Pipelines
The setup of self-healing pipelines can be split into two parts:
- Agentic fix: here we use an AI agent to diagnose the problem and push a potential solution
- Validation and PR: here we validate the solution in CI and, if effective, create a pull request for review
Once the two pipelines are configured, use your CI as usual. The setup is complete and will work on any branch that doesn't start with the name selfheal-.
Agentic Fix Pipeline
In this first step, we'll configure OpenAI's Codex to diagnose the problem and propose a solution when the CI pipeline fails. This self-healing pipeline creates a branch called selfheal-${GIT_SHA} to track changes made by the AI agent.
-
Open the project in the workflow editor
-
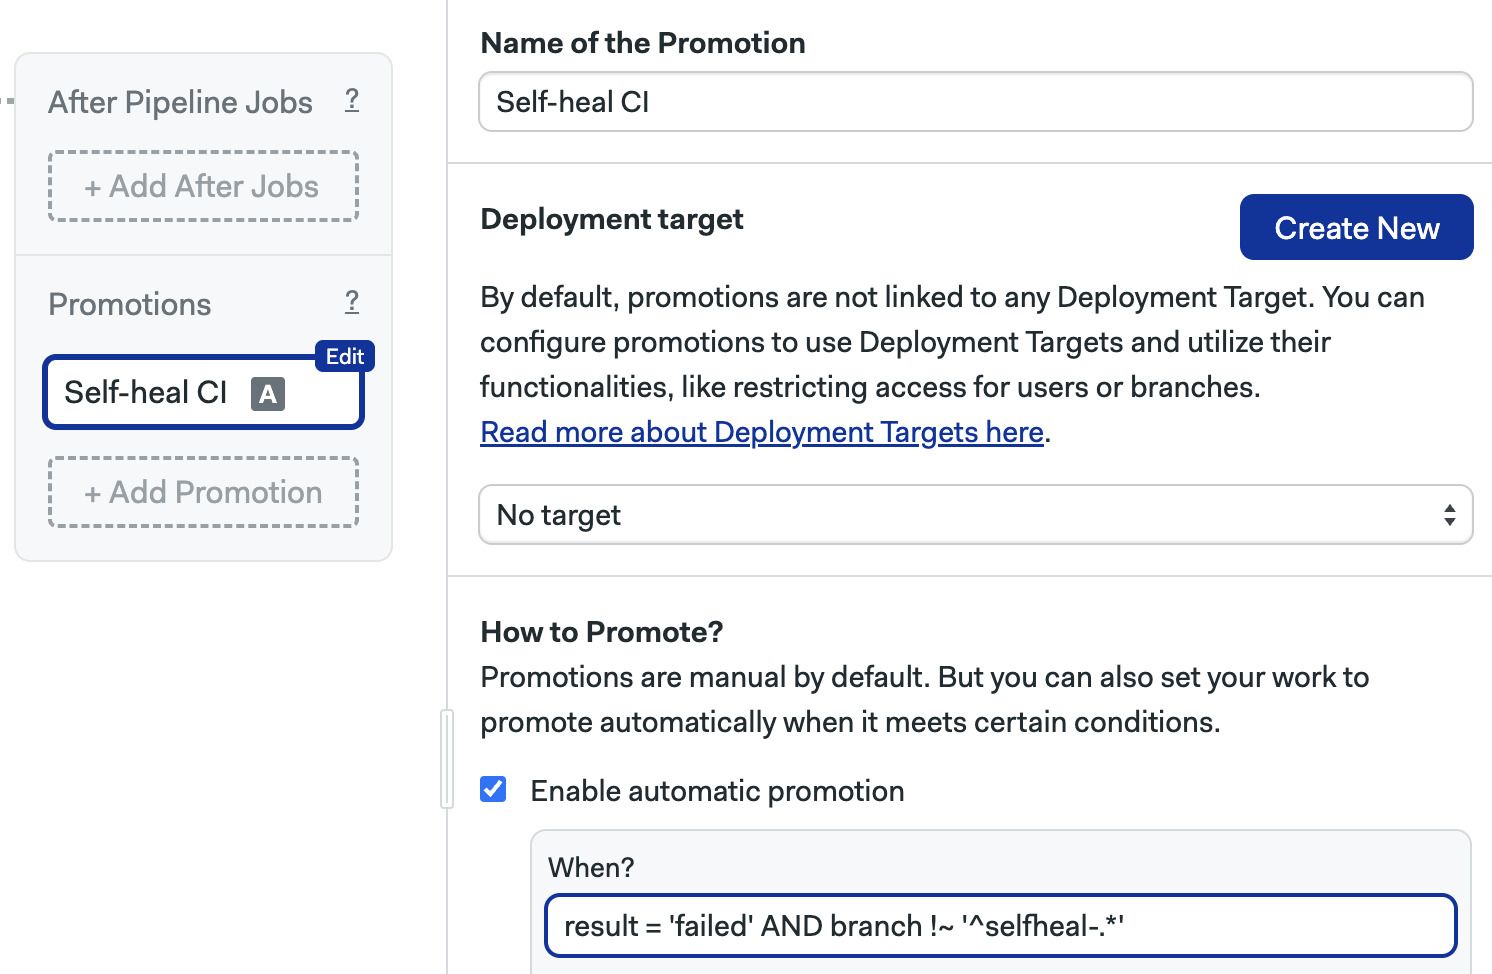
Press +Add Promotion
-
Optionally, enable Automatic promotion and type
result = 'failed' AND branch !~ '^selfheal-.*'.noteThis makes the self-healing pipeline start automatically when the main CI fails for any reason.
-
Type the following commands in the prologue of the first block in the new pipeline. These commands create the solution branch and configure the repository to be writable
Configuring Git to be writable and setting up the solution branchexport SELFHEAL_BRANCH=selfheal-${SEMAPHORE_GIT_SHA}
checkout
git config --global user.email "ci@semaphore.io"
git config --global user.name "Semaphore CI"
git remote set-url origin https://$GITHUB_TOKEN:x-oauth-basic@github.com/${SEMAPHORE_GIT_REPO_SLUG}.git
git checkout -b "$SELFHEAL_BRANCH" -
In the job, add the following commands. These configure Codex and push the solution to the repository
Configuring and running Codex to solve build errorsmkdir -p $HOME/.codex
cp selfheal/codex/config.toml $HOME/.codex
npm install -g @openai/codex
printenv OPENAI_API_KEY | codex login --with-api-key
codex exec --dangerously-bypass-approvals-and-sandbox "$(envsubst < selfheal/prompt-template.txt)"
mv commit-message.txt /tmp
cache store commit-message-$SELFHEAL_BRANCH /tmp/commit-message.txt
git add -A
git commit -m "selfheal CI: $(cat /tmp/commit-message.txt)"
git push origin "$SELFHEAL_BRANCH" -
Save the changes
Validate and Create PR Pipeline
The second pipeline only creates a pull request if the AI agent successfully fixed the CI.
-
Open the project in the workflow editor
-
Press +Add Promotion
-
Optionally, enable Automatic promotion and type
result = 'passed' AND branch =~ '^selfheal-.*'noteThis makes the PR pipeline start automatically when the main CI builds successfully on a self-healed workflow.

-
Type the following commands in the prologue of the first block in the new pipeline. These commands check out the solution branch and configure the repository to be writable
Checkout the self-healed branch and make the repository writeablecheckout
git config --global user.email "ci@semaphore.io"
git config --global user.name "Semaphore CI"
git remote set-url origin https://$GITHUB_TOKEN:x-oauth-basic@github.com/${SEMAPHORE_GIT_REPO_SLUG}.git
git fetch origin "$SEMAPHORE_GIT_BRANCH"
git checkout "$SEMAPHORE_GIT_BRANCH"
git pull origin "$SEMAPHORE_GIT_BRANCH"
cache restore commit-message-$SEMAPHORE_GIT_BRANCH -
In the job, add the following commands. These create the pull request on GitHub using the gh CLI
Create Pull Request on GitHubgh pr create --base master --title "Selfheal CI: $(cat /tmp/commit-message.txt)" --body "PR created by self-heal CI: $(cat /tmp/commit-message.txt)" -
Save your changes and use your pipeline as usual